Friday, November 18, 2011

Semi-Homemade Kitchen Towel Gift

Glory be and Hallelujah!  One Christmas sewing project was completed this morning.  :)  My mom in law has an old kitchen towel that fastens to the stove with a potholder, and she showed it to me and wished for a new one.  I was just winging it, as I tried to make one, but it came out quite nicely.  Hurray!

The supplies needed were easy.
*one kitchen towel...mine actually came from the Dollar Tree!
*one potholder with a loop at the top in the middle
*2 coordinating fabrics in her kitchen colors
*thread
*large button
*rick rack.

I cut strips of the coordinating fabrics from my stash at home. They were about 1 3/4 inches wide and about and inch longer than the width of the towel.  Iron a narrow hem on each long side, and top stitch them to the lower section of one end of the towel.  This will be the front.

On the back side, I folded that extra length into a nice hem and stitched it down.

Then I gathered the middle of the towel across its width.  I did it alitle bit higher than the very middle so that the front of the towel would definitely hang down without the back of the towel peaking out from under it.  Then pin the right side of the gathered towel to the ride side of the middle of the potholder and sew.  Make SURE that you have it so that the loop will come over the front to fasten around the button.  I suggest you pin it together, make sure it works, then sew it...to avoid frustrating mistakes.

Here is the inside (wrong side) of the potholder after the gathered towel has been sewn on.  This part will not show.

Sew a large button onto the front of the potholder so that the loop fastens over it.  I used embroidery thread and left little ends to tie, for cuteness.

Press the whole thing with an iron.  Oh, and sew on the rick rack if desired.  I decided my towel "needed" something and I had the green rick rack so it was the perfect way to tie it all together.
I'm pleased with how it came out, and I think my mom in law will love it.  Not too hard.  Can be done in small steps 15 minutes here and 15 minutes there.  And it only cost me about $3 total. :)  I don't think it will be the only one I make either.
Mom in law has been told not to read this post...so please keep this gift a secret, K?  ;)

Blessings!
Donna

Linky Parties: 
 My Romantic Home  
Tater Tots and Jello  
Sundae Scoop  
Sunday Showcase  
Made By You Monday  
More the Merrier Monday


Wednesday, November 9, 2011

Porch Chalkboard

Recently I read about the benefits of having a little chalkboard on your front porch...you can greet guests with a little message, and people who stop by when you aren't home can leave a message for you.  Brilliant!  Then I so enjoyed the cute chalkboard at Ellen's home HERE, and that clinched it for me.  Time to use that can of spray chalkboard paint that I bought 9 months ago!


The steps were very simple.  And since this is going outside, I didn't spend money on a nicer frame, nor go for perfection.  I 'shopped' the house for an old 10x13 cheap wooden frame that I hadn't used in years.  Took out the glass, cleaned the glass, then put both the frame and glass on newspaper out in the grass.  I sanded the wooden frame just a bit so the paint would stick, then wiped it clean.

My supplies

It took about 3 light coats of spray paint for both the frame and glass.  So cool how the paint worked GREAT on the glass!  I let them 'cure' overnight, and put them together this morning.  Then made a quick no-sew bow out of green polkadot fabric and stuck it onto the frame with sticky tack.

Used my best First Grade Teacher handwriting to print Autumn Greetings with a big stick of chalk and she was done!  (Hi Gracie Pup!)

Fun, easy, free...my kind of project!! Give it a try...I'm sure I'll enjoy adding different embellishments to the frame for each season.  Christmas will be fun for that!
Thank you so much for stopping by!


Blessings!
Donna


Linky Parties: 
Today's Creative Blog  
Somewhat Simple  
My Romantic Home 
Funky Junk Interiors  
Tater Tots and Jello


Sunday, November 6, 2011

Woodland Theme Baby Shower


My beautiful daughter Lindsey and husband Rich are expecting their first baby in January.  Which means I will be a Mimi for the first time.  :  Excited...ok, ecstatic!! :)  It was a joy and blessing to travel 6 hours north to be at her church baby shower this weekend, given by these two lovely ladies, Kelly and Ellen.


The baby's nursery theme is a Woodland one...it's a darling, fun theme with which to work!  Ellen's beautiful home was the perfect backdrop for all the adorable decorations she and Kelly made.  Here's the chalkboard sign welcoming us by the door.  Rich and Lindsey are keeping their baby son's name a secret, so Ellen likes to call him 'Lil Nut' for now.  :)

A darling skinny pine tree greeted us inside the entry, decorated with paper mushrooms, pinecones, and a garland of acorns.

Darling!  Lindsey loves owls.

The food table was the cutest ever, and held many yummy brunch treats! 
Here we are...the radiant new mommy in the middle with the first time great-grammy on the left (my mom) and the first time Mimi on the right (yep, that's me!)

Mason jars filled with woodland pretties were placed around the table along with mushroom place cards telling what food dishes were displayed.  Isn't it super clever how they used large marshmallows with a slit cut in the top for placecard holders?!

These darling little 'toadstools' were the star of the food show in my opinion!  String cheese stumps topped with cherry tomato halves caps and dusted with parmesan cheese.  I loved them!!


Beautiful home baked and decorated Toadstool cookies were the take home favor.

So clever...a mason jar filled with little red styrofoam beads held the forks.

Adorable name tag for Lil Nut's Mommy...and...


Lil Nut's Mimi..one for Great Grammy too!

Beautiful Woodland Bunting

Such a cute activity...newborn diapers in an antique metal basket along with Sharpies, so the ladies could write a note of encouragement on them to brighten those middle of the night feedings.  :)

Adorable wall art made by a friend from vintage game cards!!!

I love this girl.  God so blessed us with an amazing only daughter.  She will be an incredible Mommy.

Lil Nut's nursery is coming along!!  Lindsey and I had a ball starting to arrange baby's room, putting up the darling vinyl cling tree from Amazon, and unpacking her lovely gifts from the shower.  See little mallard duckie and little hedgehog on the shelf?  Precious!  And that playmat was my gift to her...a Woodland themed one that daughter couldn't do without!

Hope you enjoyed this darling baby shower.  I know I did!!!

Blessings,
Donna

Linky Parties:
Tater Tots and Jello 
Skip to My Lou  
Tip Junkie

Monday, October 24, 2011

Shop the House for Autumn Decor

Hello Autumn!  You are my favorite season, and I'm especially glad that it didn't cost a dime to bring you into my home this year.  A little felt pumpkin hanging on my china hutch makes me smile.  It's made from felt ovals, which you can find explained HERE.  The little Fall tag was also made from things I had at home and you can read about it HERE.

Apothecary Jars (a garage sale treasure!) are really fun to fill with seasonal pretties.  
This tray also gets redressed for each season.  The sweet little green custard cup has vanilla scented soy beads in it, along with a candle.  Smells so good and is a fun texture.  Soy beads hold their scent a long time...much longer than potpourri. The green footed vintage bowl is for sale in my Etsy, HERE.  So versatile!

I love little white ceramic containers...this one displays vintage family photos. Now it's dressed for fall, sitting in the middle of a fall candle ring, which came from a previous garage sale. :)

A suede green leaf placemat makes a nice centerpiece foundation for the dining table, along with a footed vase filled with fallish goodies.

The antique drawer I bought at a flea market this summer is whistling Autumn now too!  I made the felt stuffed leaves by hand.  Fun and relaxing as an evening lap craft.  The book is an antique Dr. Martin Luther German Bible from the 1800s!  Literally trash-picked from the top of a dumpster!  It's precious and was unharmed.  

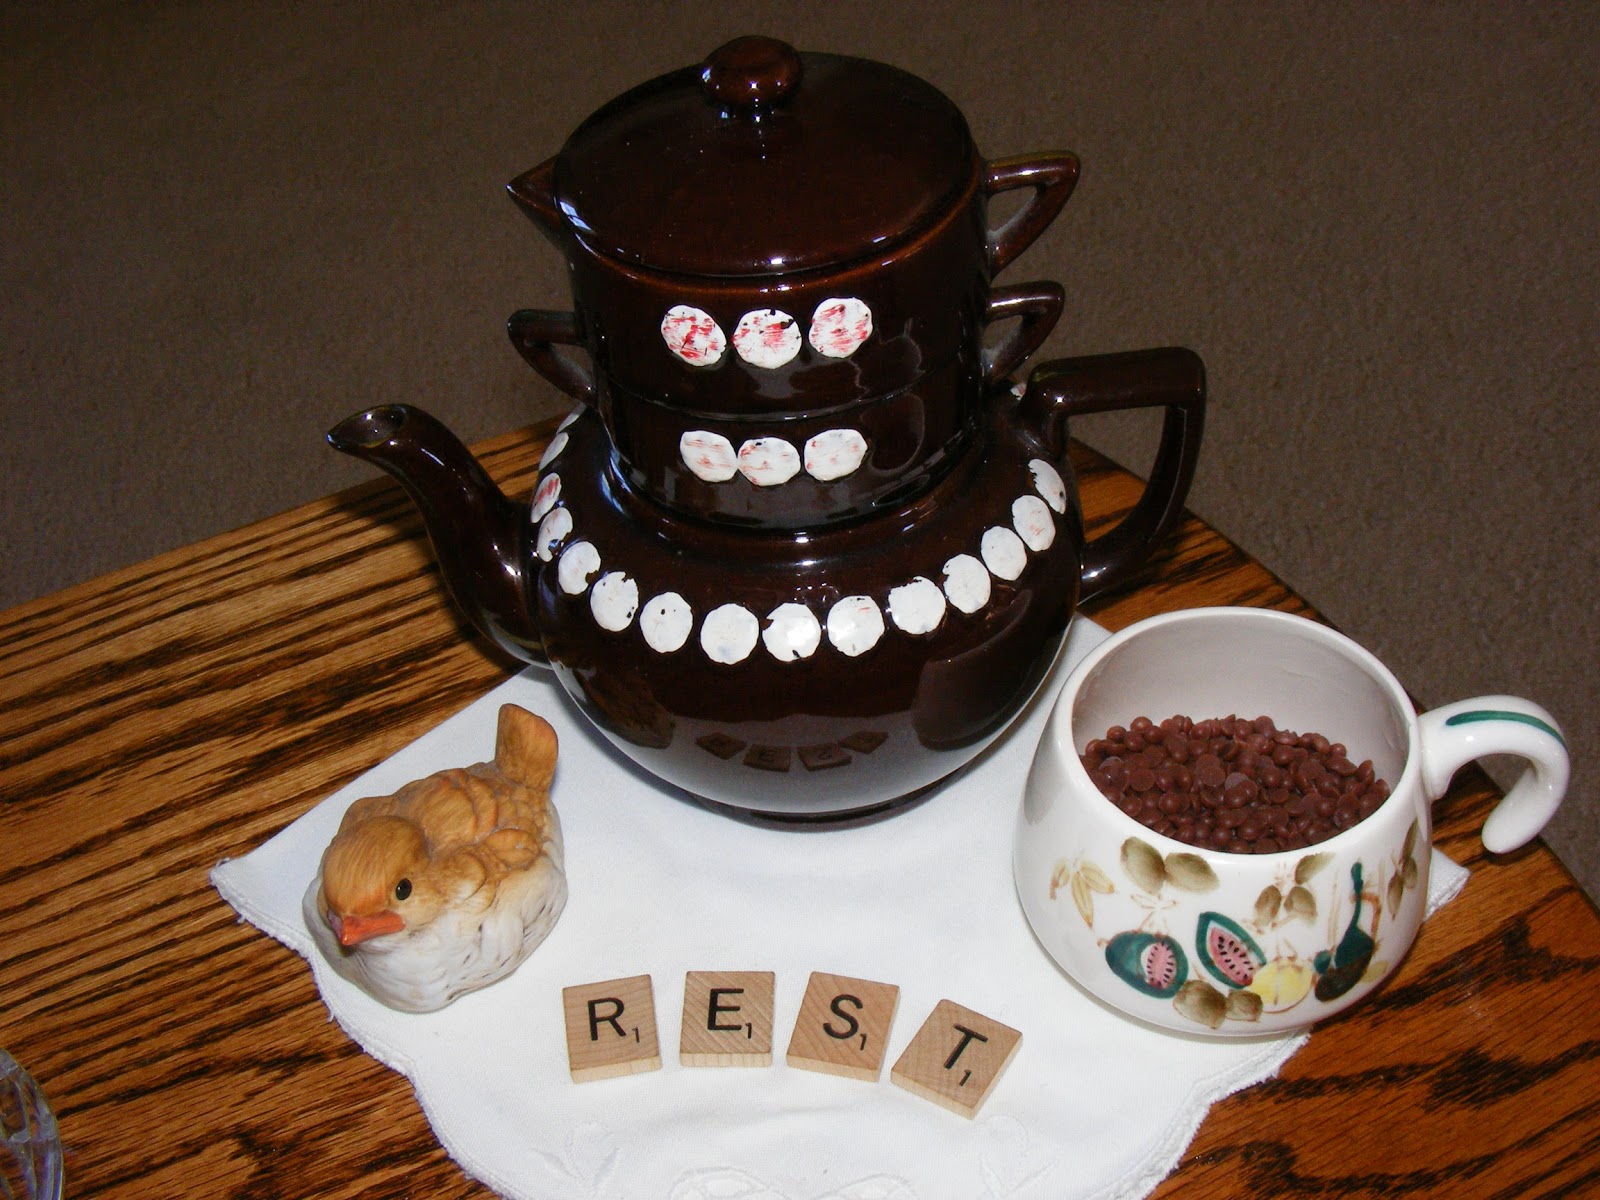
My antique Tea-For-One looks cozy with my favorite ceramic bird, antique coffee mug filled with roasted hazelnut soy beads, and Scrabble letters spelling R E S T.  Ahhhhh.

The mantel antique window also got redressed for fall.

Scrabble letters...love them.

Toilet Paper Roll pumpkin (tutorial HERE) and green candle look good together on the piano.

And lastly, my front storm door is sporting the cute silk leaf garland that my daughter stitched together for me last year.  Simple and festive!

So, without spending a dime this year, the house is dressed for Autumn...and the need of using the fireplace most evenings now is the crowning touch. I'm ready for cheery fall days and cozy fall nights.

Thank you for stopping by!

Blessings!
Donna

Linky Parties:
Made By You Monday
Tip Junkie
Motivate Me Monday
Weekend Wrap Up

Wednesday, October 19, 2011

Stitched Paper Bookmark...a Nice Little Giftie

Today I needed 2 little gifties to mail in two cards...one as a tiny b-day gift and one as a thank you gift.  It was so much fun to make these little beauties with things right in my craft stash.

I found four coordinating papers in my scrapbook supplies.  I used cardstock for the bookmark base, and the other papers as embellishments.  I folded the approximately 8 inch long cardstock strip in half and used my sewing machine to stitch on the coordinating blue rectangle to its lower half.  Next I put the brad through the printed circle and into the bookmark.  Now it was ready for the final stitching...just all the way around the exterior of the folded bookmark.  Lastly came the punched flowers, a foam dot gave dimension to the top flower, and a button finished it off.  I added 3 small pink  ribbons to the top, gluing them to the back of the bookmark.  And glued a piece of blue paper over their tails on the back, to keep it neat and tidy.  Printing out the word 'friends' in Courier font and attaching to the front was the last touch.


Lastly I added a handscripted message with a black fine tip gel pen, and the little bookmarkers were ready to pop in a card and mail.  I hope my friends will feel loved and special when this bit of handmade love is delivered to their mailbox.

Making bookmarks with paper, embellishments, and the sewing machine (or hand-stitching if need be) is fun, easy, inexpensive, and easy to mail.  Could be a sweet stocking gift or teacher's gift too!

Enjoy!!

Blessings,
Donna
Linky Parties:
Tip Junkie
Somewhat Simple
My Romantic Home

Wednesday, October 12, 2011

10 Weeks til Christmas!!

Christmas is Coming!
Just 10 weeks away...that makes me excited!!
And it means we should all be getting busy planning out meaningful, special gifts for our loved ones and friends.  

I want to invite you to come to my etsy shop, Perfect Darlings, for some one-of-a-kind gift ideas.  I offer free shipping to the lower 48 of the USA, and special rates to Canada.  If you wish to order shipment to anyplace else, I will charge you the additional cost for just that shipping amount.  Convo me.  Here's a sampling of some gifts in my shop...and THANK YOU for stopping by!  We Etsians (?!) really do appreciate your business.


Baby Crinkle Taggie Toy 

Minky dots are soft to baby's fingers and face and the crinkle sound inside is fascinating to them.

This one has a heart ironed on.


The ribbons provide tactile stimulation with their satin, gross grain, and rick rack textures.


What a sweet little stocking stuffer...easy to take along in your purse or bag and easily hangs with your little plastic toy rings to the carseat or stroller.
Sweet little handmade felt quiet book for toddlers


Sweet fabric matching game with felt pouch, with a Noah's Ark theme


A batch of vintage sewing materials for the seamstress on your list.

Vintage Square Flower Pyrex, in near perfect condition

English Wedgewood China plates

Vintage turquoise Pyrex dish in near perfect condition

Antique little salt and pepper set on a silverplated tray
Thank you so much for looking!
All this and more are ready for shipment.

Blessings!
Donna at Perfect Darlings

07 08 09 10
Pin It button on image hover