Showing posts with label DIY. Show all posts

Wednesday, October 1, 2014

DIY Mini Pumpkin Decor

I think God created miniature pumpkins to make us smile, and feel warm and fuzzy inside. :)
These sweet little embellished pumpkins are certainly doing that for me around my house.


Better Homes and Garden's October issue planted the idea in my mind.  I didn't want to go out and buy the greenery and little berries that they used, although I loved them...so I used supplies I had at home.   And I wanted to make personalized tags that said Autumn phrases that I like, so although you can find their printable tags online, I made my own.

So let's get started...buy miniature pumpkins at the grocery store.  Round up some raffia, greenery, mini flowers, craft paper, a Fall punch, twine, little hole puncher, craft glue, and a hot glue gun.  Now you are ready to roll.

I was out of brown wrapping paper (like used for wrapping a box for mailing), so I got out a brown grocery bag, cut out an 8.5x11 piece, and fed it through my printer.  Created a word doc of sweet Fall phrases including Harvest Moon, Thankful, Happy Harvest, Autumn Bliss, Blessed, and more, then printed them on the brown paper bag.  Use a variety of fun fonts, for added interest.  I have a leaf punch, so I added some orange print leaves to the tags, and punched a hole in the upper left corner of the tag.
Tie a raffia bow around the little pumpkin stems, then thread some natural twine through the tag hole, and tie the tag to the stem as well.  For this little pumpkin, I added green paper leaves to the back of the tag.
For this set of pumpkins, I hot glued a couple of vine leaves to the top for greenery.  And for some of them, I hot glued some little yellow fall flowers from the craft store.  You'll see one rogue tag in this photo...I printed out one tag I found online, but after that, I made my own.  Do whatever suits you!  :)


When you are finished, you have the FUN of setting a few around your home.  And gifting a few.  And maybe even selling a few.  :)

My $8 vintage sewing drawer with it's glass handle, is happy to be decked out for Autumn.

The fireplace mantel is dressed for Autumn, as well.  Lots of layers of like-colors, textures, and patinas make a nice mantle scape...be sure to have height in some areas...and off center height is even more interesting.


Thanks for popping by to visit!  Your comments and pins mean alot!

Fall Blessings,

Donna

Linked To:
Thrifty Thursday
My Romantic Home


Wednesday, April 23, 2014

DIY Apron Mother's Day Card


My mother's birthday was in early April, and as I flipped through one of my paper craft books, I found a darling idea for a card.
Putting my own twist on it, I created a little handmade apron for the front of her card, pictured above, and she was delighted with it.  So were my friends.  :)  And so began my journey in making variations of these cards for sale to friends and in my Etsy shop.  However, I won't keep all the fun to myself...so here is a DIY tutorial in case you want to make your own.  :)
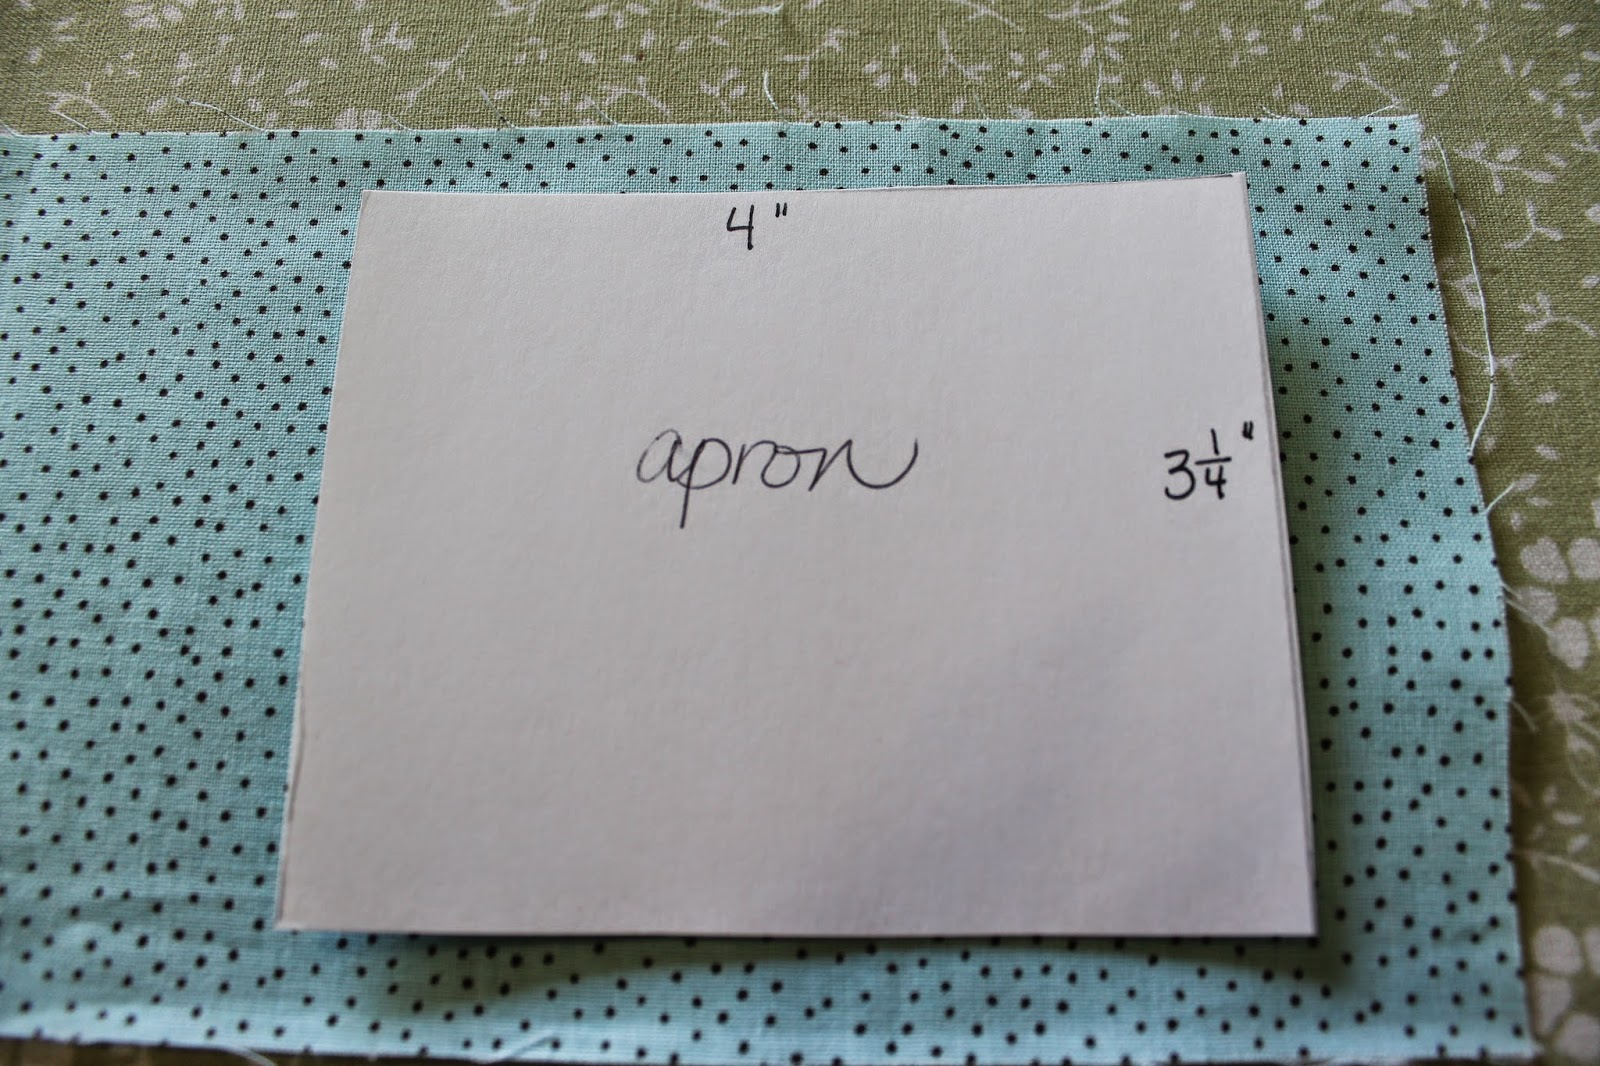
Make a little cardstock pattern for your apron...4" x 3 1/4" and cut out your fabric.

Iron a 1/4" hem on the two short sides and one long side.

Sew those 3 little ironed down hems.

Along the unhemmed long edge, sew a basting stitch about 1/4" from the edge, for gathering.  Leave long thread ends for pulling, as show.

Gently pull the basting thread on top of the right side, to gather.  And pull the basting thread underneath on the left side, to finish gathering.  If you pull the top threads on both side or the bottom threads on both sides, your thread will lock up and not gather.  Spread your gathers out evenly.

Next take a coordinating piece of ribbon, about 5" long (give or take) and either pin it or spot glue it to the top of your apron, covering the basting thread and the top edge of the fabric.  If either the top edge of the fabric or the basting shows after you stitch on your ribbon, you can trim them/remove the basting thread til it looks clean.  I like to use a zig zag stitch to attach the ribbon to the top of the apron, to create it's waist band.  The pinning or spot gluing just helps hold it in place while you sew.

Hope you can see the zig zag stitching which attached the ribbon to the apron's waist.

Next you want to adorn the hemline of the apron with rick rack or some decorative stitching.  I have fallen in love with the vintage look of the decorative stitching.  #13 is my favorite pattern for this.  

For best results, have your thread be a coordinating color that will show up well.  I sew that stitch about 1/4" from the hem stitching at the bottom of the apron.

Ta Daaa!  Doesn't it just make you want to get out your childhood Barbies and try it on her?!

Next, clip miniature clothespins to the top of your apron.  Prepare your card with a pretty cardstock mat on the front and use a glue gun to attach the clothespins to the card.  Angle your apron as seen in the finished photo.

Type out some different sayings to go on the front of your card, and print them.

I glued my sentiment to a pretty coordinating cardstock, then matted that with a piece of a vintage book page.  I attached it to the card with a foam block, to add dimension.

Are you in love yet?  Want to wear the apron yourself?

Add caption

Finish it off with a coordinating punched heart or flower attached to the back flap of the envelope.  Pretty.  Special.  One of a kind.

And you are finished!  If you do not sew or have time to make these, please visit my Etsy shop called Perfect Darlings to purchase one from me.  :)  Or make your own and have a great time!  As a courtesy, I would greatly appreciate it, however, if you would refrain from selling yours on Etsy...I'm sure you can appreciate that.  :)

Happy Mother's Day!
Your comments always brighten my day!


Be Blessed,
Donna

Linked to:
We Did It Wednesday


Monday, July 8, 2013

A Semi-Homemade Toddler Photo Book

I have been so blessed by God!  Not only do I have 2 adult children with wonderful spouses plus a teenage son still at home, but I have TWO grandbabies who are just 7 weeks apart in age!  And not only do I have two close in age, but I have a Grand BOY and a Grand GIRL!  The best of both worlds!  Carson and Eloise are my joy and delight.


Since I love to make things for them, I had a ball making a cute photo book for them featuring my little dog Gracie.  They like to see Gracie when I FaceTime with them, so I knew she'd make an interesting book for them to read.  I'm always looking for ways to build my and my husband's relationship with them even though we live 6 hours apart and only see them about every 2-3 months.

I purchased a $1 board book at the Dollar Tree as the base for my book.  I had photos printed to go in the book and in order to fit more photos in this little 6" square book, I used Walmart's collage prints to put two photos on a 4x6 print and then cut them apart.  I also used some full 4x6 inch prints for a few special photos.

I cut out cardstock pages to fit over the board books pages, using a pattern I traced on cardstock of the page.  Then I laid out the photos on the pages in an order that fit a little story I could tell about Mimi's Puppy, Gracie.
I glued the pages to the book, and the photos to the page, adding some typed up story balloons to fit with each page.  Stickers added a few more cute details to each page.

You know how the first time you make something, you learn alot and find things you'd do differently?  Well, so was the case with this book.  I Mod Podged the front and back cover to make it toddler-proof.  I tried to Mod Podge the inner pages too but the paper began to bubble.  I think it might have helped to attach the pages to the book with Mod Podge first rather than with spray adhesive.  Then maybe the Mod Podge over the top of the pages/pictures would not have bubbled the paper.  I will try that next time.  I also tried Clear Contact Paper, and it wasn't ideal either.  Let me know if you figure out the perfect solution before I do!
 

For Carson's book I made the back cover be a picture of his Mama (our daughter) with Gracie the Dog.  For Eloise's book, which is in process, I will put a picture of her Daddy (our son) with Gracie.  Fun to personalize the books this way.


I love these GRANDDARLINGS so much!  Carson is full of curiousity, noise, busyness, and sugar.  Eloise is sweet, gentle, talkative, and so sugary.  Our tradition is that each time I get to be with both babies at once, we get a picture of me holding them together.  It's getting harder, as you can see!  :)  
Thank you for stopping by!  I would love to hear about it if you try this idea too.  I've thought of some fun photo books ideas for the future...one about all the family members, one of nature pictures that I take where they have to look and find things in the photo, one for holidays, etc.  So many ideas...so little time!
Blessings,
Donna


Linked To:
Lady Bug Blessings
Show Me What Ya Got
Home Stories A-Z
Crafty Girl Linky Party
Tater Tots and Jello
Sew Many Ways
Made By You Monday
Inspiration Monday Linky Party

Tuesday, March 12, 2013

Family Binder For My Daughter in Law {Love}


Our son is getting married in 10 days!  We are excited for the wedding and the joy this marriage will bring.  I had the joy of traveling to Chicago for our new daughter-in-law's bridal shower in February.  Besides purchasing a gift for them from their registry, I wanted to create something more personal and unique for them.  I decided to make a Family Binder for our new daughter in law, so that she could have some info and dates and recipes from our family available for when she wants or needs them.  It turned out well and was a fun gift to make.

In the first page protector sleeve, I placed a letter I had written to her...telling her how much we love her and are excited to have her in our family.


I thought that putting our son's family tree in the binder might be helpful someday if they need the full names of some of our family members.

I created a page of all of the birthdays of our son's side of the family, and what year they were born.  

The email addresses of all the family members.

Some Hayden Family favorite recipes, and the little stories behind these dishes.


More recipes


I also included 3 pages of photos of our son during his growing up years, so she can see how their children resemble him for the future.


The ladies at the shower passed around the book and enjoyed looking through it.

And here is the lovely bride to be...the next Mrs. Hayden!

I decorated the front clear pocket of the binder with some vintage book hearts that I handstitched together with embroidery thread.  I also made their last name initial out of 2 colors of paper plus a vintage book page.  And lastly some little book page birds, and a part of our daughter in law's favorite quote.


Consider this idea as a creative, helpful, thoughtful gift for any new bride to be!

Thank you for stopping by!


Blessings!

Donna

Linked to:
My Romantic Home
JoJo and Eloise
Sunday Showcase


Saturday, August 25, 2012

DIY Kitchen Towels for Gifts and for You!

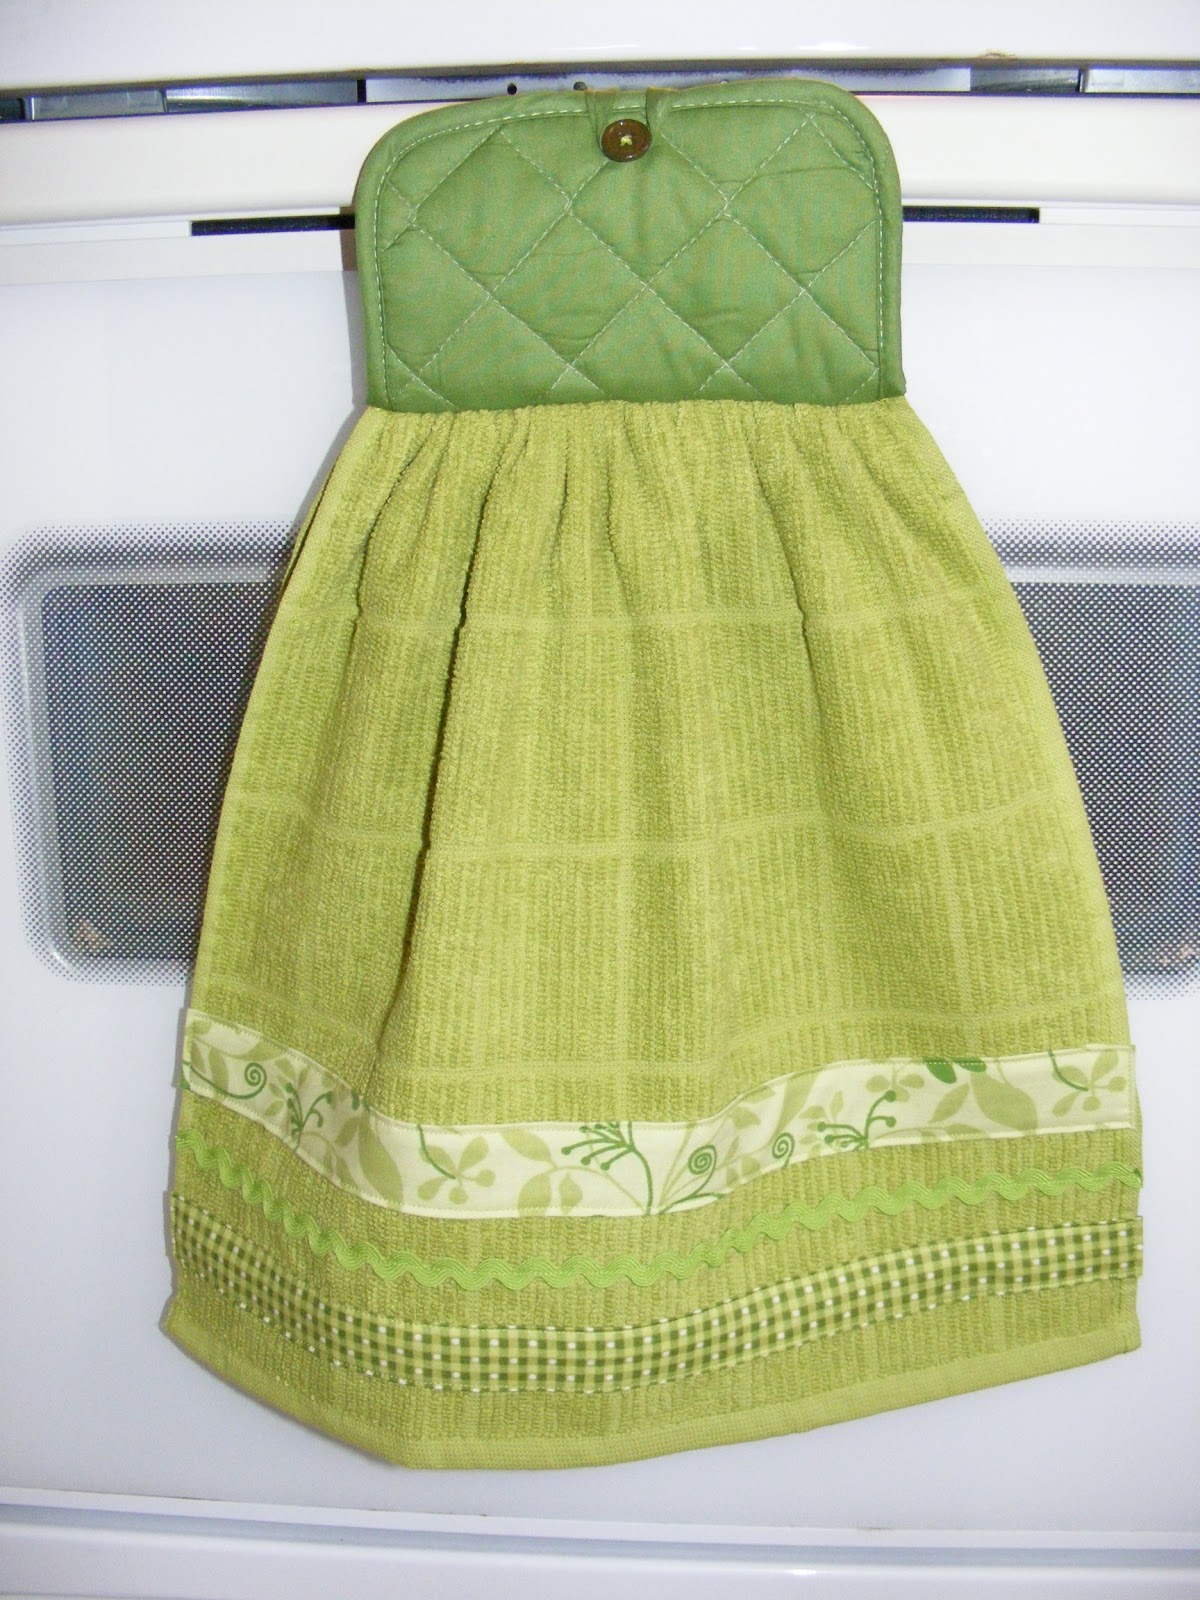
Last Christmas I figured out how to embellish a kitchen towel for my mother-in-law into one that fastened on to her oven handle.  One of  our dear family friends liked it so much, she asked if I could make 3 for her to give as gifts!  So knowing that she wanted 3 towels in a green palette, I bought 3 nice towels on sale at Target, and used some cute scraps of fabric  plus rick rack and ribbon, and in no time had these three little ladies ready for giving.
This one has the potholder attached to the top, like the one I made for my Mother-in-Law so that it can be fastened to the oven handle.  I plan to attach green potholders to the other 2 towels as well, once I find the ones I need at the store.  

I ironed in a hem on all sides of the strips of coordinating fabrics and sewed them to the towel, plus added rick rack for a sweet vintage touch.

For this towel, I machine stitched 3 rectangles of fabric together to make one long strip.  Then ironed in a hem and sewed it to the towel, finishing it with some rick rack.


This 3rd one is my favorite.  I love the four bits of fabric sewn together, and I put a little green bow on the 'different' square which is mostly yellow with flecks of green in it.  Putting it off center adds interest.
I heat sealed the ends of the ribbon and sewed it on securely.

I also heat sealed the ends of the rick rack so they will wash up nicely.  I was sorely tempted to add some buttons as embellishments, but that would hurt when you dried your hands on these, so I stuck with soft embellishments.
I'm thinking these would make nice Christmas gifts...and who knows they might end up being a new product on my Etsy shop, Perfect Darlings.

You can make your own if you have a sewing machine and can sew a straight line!  Give it a try.

Blessings!

Donna
Linked to:  My Romantic Home, 2805, At the Picket Fence,
07 08 09 10
Pin It button on image hover