Wednesday, December 21, 2011

Starbucks Cup Scrapbook

I'm excited to share this fun craft with you today!  I learned this idea from Angie at Echos of Laughter last year.  She is such a creative girl!  Be sure and check out her delightful blog for a full tutorial on this little scrapbook.

This Starbucks cup was my holiday drink from last December...white mocha I think!  It's fun b/c the markings on the front of the cup are a remembrance of what I had that day while Christmas shopping with my mom.  :)  I  brought it home, washed it, and saved it for making a cute December scrapbook.

You cut the bottom of the cup off and then cut the cup down the seam to make the cover of your book.

Then you make a template for your pages.  I covered the inside of the 'cover' with cute paper and then made double page spread pages for the rest.

Since my b-day is in December, I decided to make my book about all the festivities of December rather than just Christmas.  Because the pages are small I had to get creative with the photos...cropping them when I was able, or cutting them and squishing them together.

It's cute to use as many 3D touches as you can...so I used foam dots under embellishments and little photos.

I also put photos of a craft I made for gifts and of some decor I used for a dinner party.  Note the C'mas tree embellishment with a button on top.

Our Christmas Eve appetizer buffet...I had to cut part of the photo and superimpose it over the main part of the photo to get most of it on this page.

Using a circle punch I was able to put all of the photos of our family that were together for Christmas on one page even though the page was small.  And I put a foam dot under three of our photos for some depth.

Our puppy dog's stocking!  And I found that one of my photos had this picture of my Gooseberry Patch calendar in it, so I cut it out to add to the book.  :)

We had a white Christmas!

My sweet puppy-girl...Gracie.  She was enjoying Christmas Day!

Here you can see that I cut the photo in half and spread it over two pages.

The back of the book is where I attached the baker's twine to be the little closure for the book. A circle of paper hides the attachment. A button on the front is perfect for wrapping the twine around to keep the little book closed.

And I used a pick to poke 2 holes in the middle (folded part) of the pages and the cover.  This baker's twine ties it all together.  Worked out really well.

I hope you enjoyed this little sweet idea!  And thank you Angie for this adorable, brilliant idea!  I really love it!  

Merry Christmas!!
Donna


Linked To:
Whatever Goes Wednesday 
My Romantic Home
Tip Junkie
Here's to Handy Andy

Wednesday, December 14, 2011

One Hour Purse Organizer

I had some unexpected time at home alone tonight.  Bliss!  So I got busy on a project I was dying to make, and bingo!  It just took about an hour to make this fun, cute purse organizer.  I want to be sure to give the credit for this inspiration to the blogger at The Giving Flower.  She has a very nice tutorial here, so be sure to visit her blog in order to get all the instructions.

I went through my fabric stash and found these cute coordinating prints that would work.  I'm in love with all things vintage so that's why I chose this.  Yvonne, do you recognize this fabric?!  Thanks to you, I had it here...ready to use!!!

After measuring, ironing on interfacing, sewing, and ironing, it was ready to use.  You lay out your organizer before you sew the pockets and determine what items you want to go in it.  Then using a disappearing ink fabric pen, you mark off the size of pockets to fit your needs.

I left the last pocket on the right for kind of 'general' use.  Right now it is housing my lip balm and change purse.

Here's the reason I needed a purse organizer...I bought this bag recently at Hobby Lobby.  It's supposed to be a combo purse/tote bag for my 'must haves' and my new birthday present...more on that in a minute.

After fitting all my must haves in the organizer, I worked with it, to kind of roll it or fold it into a workable bundle.

This is designed so that when I want to change purses, for something smaller and nicer, I can just grab this organizer and plop it right into the purse of my choice.

My birthday gift.  That needed housing for going out and about. Yes, my husband spoiled me rotten.  He's so good to me!!

And here is my new bigger purse, all outfitted, organized, and ready for shopping, going to church, or any place.  I still have room in there for my Bible on Sundays.  Peachy!!

Miss Gracie Anne found it fascinating.  She's a girl.  Girls love purses.  

Yes, that might be a Dove Chocolate Easter Egg in there.  I try to have a small stash of dark chocolate on hand for come-what-may.  :)

So...if you need a purse organizer or wish to make one for a gift, check out the tutorial at The Giving Flower and go for it.  I'm sooo happy to get mine done.  Now...back to addressing thank you notes and Christmas cards.  :)

Blessings!
Donna

Linky Parties:
My Romantic Home
Made by you Monday  
Tip Junkie

Tuesday, December 13, 2011

Turning Fifty is Fabulous!!

December 11, 1961...the Lord brought me into this world.  Unbelievably, that was 50 years ago!  How can I be a half century old?!  Oh well, might as well enjoy it!

It was such a fun celebratory weekend.  The night before my birthday, my sweet husband John and I had a night on the town.  Dinner at a Spanish Tapas Restaurant.


Yum!!

Theeeeennnnn...an evening at the Jim Brickman Christmas Concert!!  Love, love, love!!


Dad and Mom gave me a dozen red roses for my birthday.  Awwww.


Then Sunday, my actual birthday, we met my folks at The Lonestar Steakhouse for lunch after church.


French Fried Green Beans.  A-maaaa-zing!!


Then home for my gifties.  One from my daughter was Baker's Twine...yippeee!

Scotty McCreery can now croon to me while I cook dinner, thanks to my childhood bestie, Sandy!!

I was spoiled.  Rotten.  But I'm enjoying every bit of it!!  Yes, that is my amazing new iPad!!


Thank you Jesus for 50 full, healthy, happy years.  I'm so blessed with family, friends, and living my dream as a stay at home mom, wife, homeschool teacher, crafter, and soon to be Mimi to 2 little grandbabies in 2012!!

Blessings,
Donna


Thursday, December 1, 2011

That's A Wrap!

Hello my friends!  It's been a couple of weeks since I've blogged.  Because of Thanksgiving (we had ALL of our birdies back in the nest for two nights...bliss!) and because my etsy shop has kept me humming away on my sewing machine!  That's been a fun and happy thing.

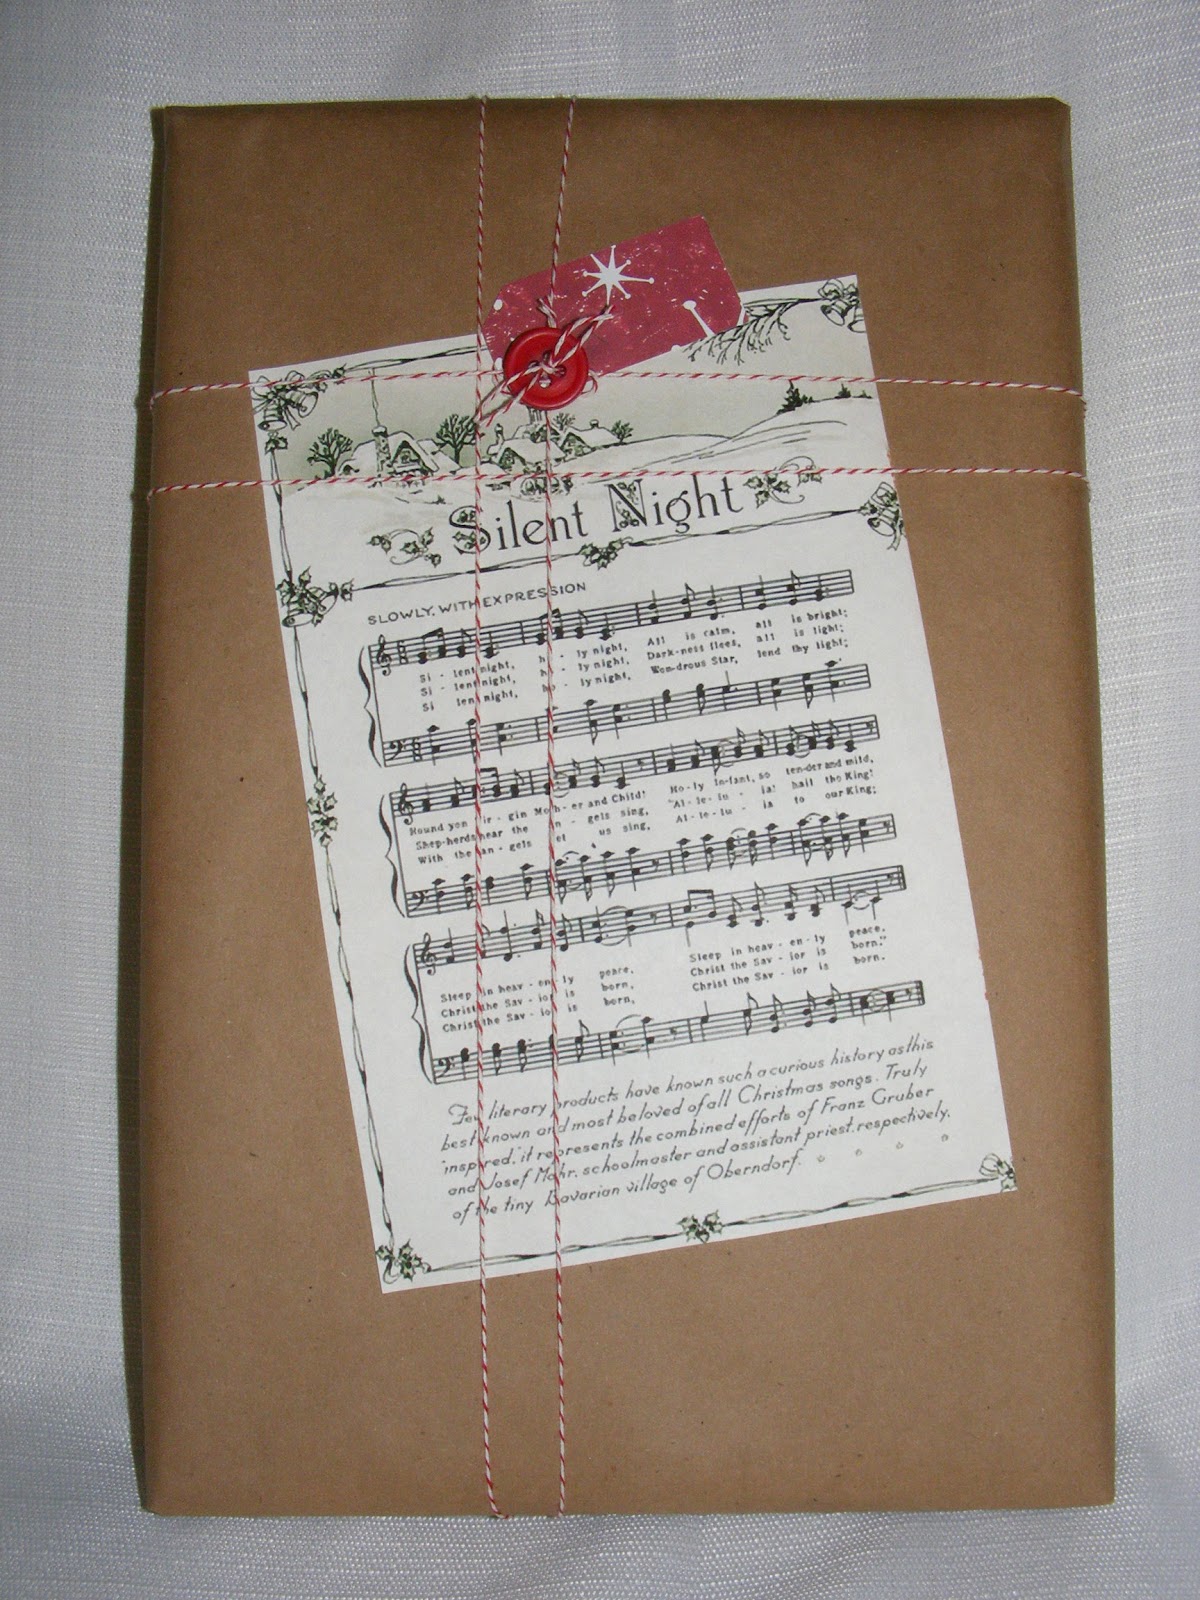
Dear daughter brought our Christmas gifts and my December b-day gifts to leave with us.  She did SUCH a cute job wrapping mine, that I had to show-n-tell them with you.


Isn't my Christmas gift festive and sweet?!  She used Dollar Tree kraft paper, baker's twine, a printable sheet of Silent Night (pinterest), and a button.  I.  Just.  Love.  It!!
It will go in the front under the tree.  :)

I like the way she put the sheet music on at an angle, and has the twine strings spread apart.  Kraft paper, black, white, and red just go together.


And THESE are my b-day gifties!!  Again, so cute and interesting.  I can hardly wait to see what they contain!


She used Dollar Tree kraft paper that has printed pink and brown polka dots on them...such cute paper!  And the raffia, buttons, and string are the perfect touch.  

Have you ever tried sewing on kraft paper?  You should!  It's easy, fun, and makes such a cute presentation.  Isn't the pouch on the left, with the flap lid, cute?

And a paper cut out flower adds a sweet splash of color on the box on the right.  

See the middle sized one in the back?  It is completely sewn all the way around.  She put the gift in between 2 piece of kraft paper and sewed the package together!  How fun is that!  :)


Know what that pink string is wrapped willy-nilly around the two little boxes?  Pink crochet thread!!  Much less expensive than baker's twine, and just as cute!!  After seeing her idea on this, I purchased some red crochet thread to use on some Christmas gifts, and wrapping my etsy orders for December.

Here's a secret...I REALLY don't like to wrap gifts.  Ugh.  But these ideas, are going to make it alittle more fun to be creative this Christmas. 
So thank you, dear Lindsey, for making my gifts soooo
pretty this year!  She says it might be the last time for a few years...she's expecting our first granchild in about 6 weeks.  :)

Blessings and Christmas Cheer,
Donna

Linky Partaysss:


Friday, November 18, 2011

Semi-Homemade Kitchen Towel Gift

Glory be and Hallelujah!  One Christmas sewing project was completed this morning.  :)  My mom in law has an old kitchen towel that fastens to the stove with a potholder, and she showed it to me and wished for a new one.  I was just winging it, as I tried to make one, but it came out quite nicely.  Hurray!

The supplies needed were easy.
*one kitchen towel...mine actually came from the Dollar Tree!
*one potholder with a loop at the top in the middle
*2 coordinating fabrics in her kitchen colors
*thread
*large button
*rick rack.

I cut strips of the coordinating fabrics from my stash at home. They were about 1 3/4 inches wide and about and inch longer than the width of the towel.  Iron a narrow hem on each long side, and top stitch them to the lower section of one end of the towel.  This will be the front.

On the back side, I folded that extra length into a nice hem and stitched it down.

Then I gathered the middle of the towel across its width.  I did it alitle bit higher than the very middle so that the front of the towel would definitely hang down without the back of the towel peaking out from under it.  Then pin the right side of the gathered towel to the ride side of the middle of the potholder and sew.  Make SURE that you have it so that the loop will come over the front to fasten around the button.  I suggest you pin it together, make sure it works, then sew it...to avoid frustrating mistakes.

Here is the inside (wrong side) of the potholder after the gathered towel has been sewn on.  This part will not show.

Sew a large button onto the front of the potholder so that the loop fastens over it.  I used embroidery thread and left little ends to tie, for cuteness.

Press the whole thing with an iron.  Oh, and sew on the rick rack if desired.  I decided my towel "needed" something and I had the green rick rack so it was the perfect way to tie it all together.
I'm pleased with how it came out, and I think my mom in law will love it.  Not too hard.  Can be done in small steps 15 minutes here and 15 minutes there.  And it only cost me about $3 total. :)  I don't think it will be the only one I make either.
Mom in law has been told not to read this post...so please keep this gift a secret, K?  ;)

Blessings!
Donna

Linky Parties: 
 My Romantic Home  
Tater Tots and Jello  
Sundae Scoop  
Sunday Showcase  
Made By You Monday  
More the Merrier Monday


07 08 09 10
Pin It button on image hover