Wednesday, April 23, 2014

DIY Apron Mother's Day Card


My mother's birthday was in early April, and as I flipped through one of my paper craft books, I found a darling idea for a card.
Putting my own twist on it, I created a little handmade apron for the front of her card, pictured above, and she was delighted with it.  So were my friends.  :)  And so began my journey in making variations of these cards for sale to friends and in my Etsy shop.  However, I won't keep all the fun to myself...so here is a DIY tutorial in case you want to make your own.  :)
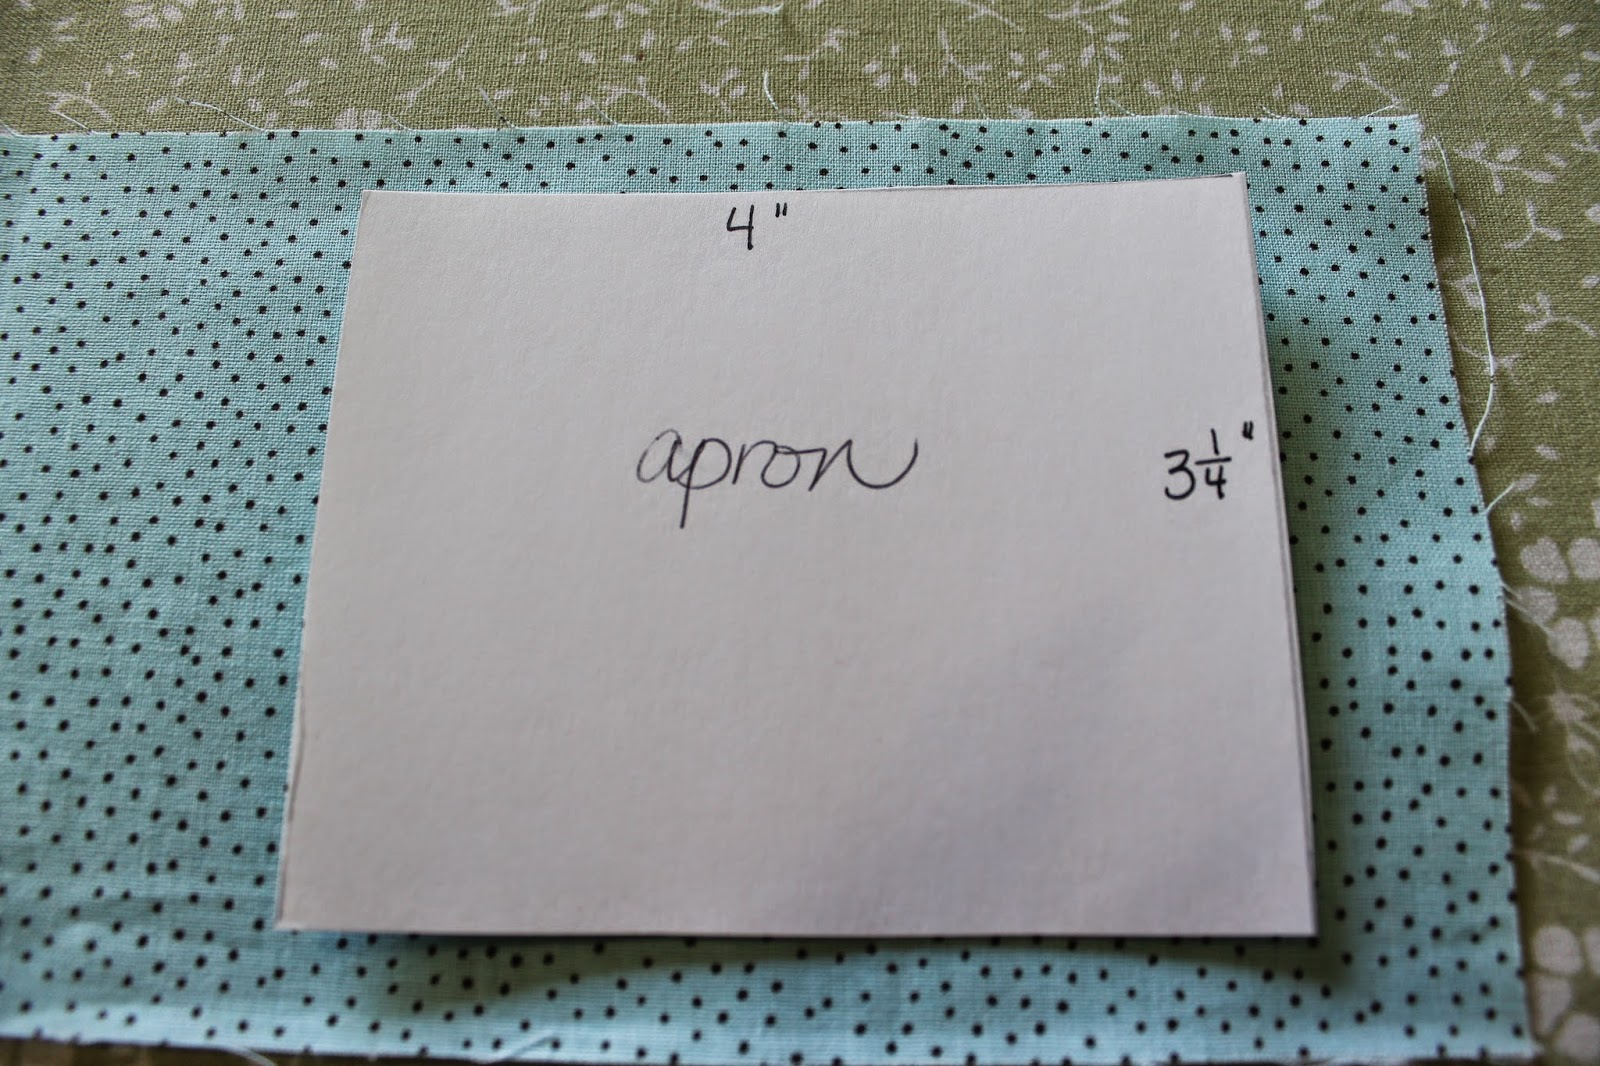
Make a little cardstock pattern for your apron...4" x 3 1/4" and cut out your fabric.

Iron a 1/4" hem on the two short sides and one long side.

Sew those 3 little ironed down hems.

Along the unhemmed long edge, sew a basting stitch about 1/4" from the edge, for gathering.  Leave long thread ends for pulling, as show.

Gently pull the basting thread on top of the right side, to gather.  And pull the basting thread underneath on the left side, to finish gathering.  If you pull the top threads on both side or the bottom threads on both sides, your thread will lock up and not gather.  Spread your gathers out evenly.

Next take a coordinating piece of ribbon, about 5" long (give or take) and either pin it or spot glue it to the top of your apron, covering the basting thread and the top edge of the fabric.  If either the top edge of the fabric or the basting shows after you stitch on your ribbon, you can trim them/remove the basting thread til it looks clean.  I like to use a zig zag stitch to attach the ribbon to the top of the apron, to create it's waist band.  The pinning or spot gluing just helps hold it in place while you sew.

Hope you can see the zig zag stitching which attached the ribbon to the apron's waist.

Next you want to adorn the hemline of the apron with rick rack or some decorative stitching.  I have fallen in love with the vintage look of the decorative stitching.  #13 is my favorite pattern for this.  

For best results, have your thread be a coordinating color that will show up well.  I sew that stitch about 1/4" from the hem stitching at the bottom of the apron.

Ta Daaa!  Doesn't it just make you want to get out your childhood Barbies and try it on her?!

Next, clip miniature clothespins to the top of your apron.  Prepare your card with a pretty cardstock mat on the front and use a glue gun to attach the clothespins to the card.  Angle your apron as seen in the finished photo.

Type out some different sayings to go on the front of your card, and print them.

I glued my sentiment to a pretty coordinating cardstock, then matted that with a piece of a vintage book page.  I attached it to the card with a foam block, to add dimension.

Are you in love yet?  Want to wear the apron yourself?

Add caption

Finish it off with a coordinating punched heart or flower attached to the back flap of the envelope.  Pretty.  Special.  One of a kind.

And you are finished!  If you do not sew or have time to make these, please visit my Etsy shop called Perfect Darlings to purchase one from me.  :)  Or make your own and have a great time!  As a courtesy, I would greatly appreciate it, however, if you would refrain from selling yours on Etsy...I'm sure you can appreciate that.  :)

Happy Mother's Day!
Your comments always brighten my day!


Be Blessed,
Donna

Linked to:
We Did It Wednesday


Monday, April 21, 2014

eBaying Our Way to St. Louis!

With our parents, siblings, grown children, and little grands spread out between Kansas City, Chicago, Northern Indiana and Southern Indiana, we have to create situations where we can all get together to visit.  It's important that our grown kids get to see their grandparents every year.  And that the great grandparents get to see their little great grands every year.  We not only have distance separating us, but different work situations and careers...we have a youth pastor, teacher, cafe manager, and more.  Finding time when everyone we can take off work is a challenge, too.

So this past winter, we were able to coordinate dates and pick 3 days to meet up for a family gathering.  We chose St. Louis as our place to meet, as it is centrally located and has so much for families to do!  We found a house to rent for us and our grown kids, and the other family members will stay in a nearby hotel.  So with a location and some dates chosen, the next step was to pay for this shindig!  :)  With our youngest son having expensive dental and orthodontic work done, and my husband gazelle-intense on saving for retirement, I wanted to get creative with the finances of this trip.


About the same time, my husband and I began cleaning out some closets.  We normally donate everything to Goodwill and take a tax credit from it.  This time, however, we kind of hated to just give away some of the nicer items.  Just for kicks, we listed 2 things on eBay. This was our first time to try to sell anything on eBay...we just kind of learned as we went.  But we were totally shocked that our son's Nike basketball shoes sold for $28.  And REALLY surprised that the old dvd series I bought for $2 at a garage sale some years back, sold for $43!  We were hooked!


Since then, I have been systematically going through the house, looking for things that we don't need, that might sell on eBay.  And my goal in all of this is that I might pay for most of our St. Louis trip by this method.  I've had good success with selling dvds, children's books, homeschool curriculum, and name brand clothing.  We've sold a Vietnam War mess kit my mom found in their new house's attic, a miniature tea set, and the graphing calculator that our older kids used for a bit in high school.


Some sales are just $1.99 plus shipping.  Our largest sale has been the dvd series and the graphing calculator for $57 plus shipping.  A friend told us that he recently made $250 by selling his too-large Big and Tall men's shirts on eBay.  He said they sell like hotcakes.  So when I came upon some nice, name brand B&T men's shirts at a garage sale for $1 each, I took a chance and bought 2.  After listing them a week ago, I was tickled to sell them for $5.99 and $7.50 each plus shipping.


Mostly we have just sold our own items.  So the $464.00 we've made since January, is purely 'found' money.  Our house is losing weight...and our paypal account is gaining weight!


I just wanted to share this fun story with you, in case you want to make some extra cash right from the comfort of your own home.  I'm making about $100 a month, and not spending much time at it at all.  I'm hoping to have $600 by the time we go on our trip...that will pay for our lodging and gas, at least.  Since I'm a stay-at-home Mom, homeschool teacher, and Etsy shop owner, I find particular joy in helping out financially without having to leave home and go to a job.

Inspired?  Already an eBay seller?  Would love to hear your story, too!

Be Blessed,

Sunday, April 6, 2014

Handmade Sympathy Cards Using Hymnal Pages

This week I needed to send two sympathy cards to friends.  We didn't have any that I liked, and these friends are very special.  So I decided to make some.  I sat down at my ironing board (an ironing board, lowered to table height, makes a great craft table in a small space!) and looked over my paper crafting supplies.  Then I knew what I wanted to do...use a vintage hymnal page of a hymn about heaven, to make the cards.  I have 2 old hymnals that I use for making special crafts...I'll let the pictures speak for themselves.


I like to use pre-made white cardstock cards from Michaels, and decorate the fronts of them as well as adding a little coordinating embellishment on the back of the envelope.  The card with the bird on it is for a man who lost his brother recently, so I tried to add a bit of masculinity with some burlap layered under the bird.  Using decorative scissors in the antique pattern made the hymn page look torn on both sides.

Handmade cards are always a gift.  And hymns comfort our souls.  When put together, I hope it brings comfort and love to our friends who have said an earthly goodbye to their loved ones.

Be Blessed,

Donna
Linked to:

Sunday, March 30, 2014

A 30 Minute Spring Bunting

I do believe that Spring has come to stay here in Southern Indiana.  We'll still have some chilly days, but I think the highs will now be in the 50s, 60s, and above.  Yay!  I just enjoyed a lovely week of Spring Break...I homeschool our 16 year old son, and so it was nice to have a full week off of school to do some deep cleaning, organizing, reading, and of course, crafting.  :)  The mantel needed a new Spring bunting, but having already done lots of crafting this week, I wanted it to be quick and 'semi-homemade' so here's what I did.


I used some cute cardstock cards that are designed for Artist Trading Cards or scrapbooking, and just embellished them a bit.

In between each embelllished card is a little book-page square that I punched from a vintage book, layered with a punched flower and a stick on center.


Mini clothespins made it a quick project too, and within 30 minutes, my bunting was hung.  I like it!  And I could reuse any of these elements for a different project sometime, if I wish, since they are not glued or sewed to the string.

Thanks for popping by!

Happy Spring!
Donna

Thursday, March 20, 2014

Being a Mimi Across the Miles


My husband and I had the joy of becoming Papa and Mimi to TWO little love bugs 2 years ago!  Our grandson, Carson, was born first, and then just 7 weeks later, our granddaughter Eloise was born!  Oh how we love and enjoy our precious little grands! But they both live 6 hours north of us, so we have to be creative in building our relationship with them in between visits.  Now that they are both two, I'm having alot of fun adding some 'friends' to our Face Time visits.  They both grin, reach out to try to touch them, and sometimes say, "Want it!  Hold it!"

Carson and Eloise love Daniel Tiger's Neighborhood on PBS.  Recently I went online and found some Daniel Tiger coloring sheets to print.  I colored the two main characters and cut them out.  Eloise was surprised when Daniel Tiger and Katarina Kitty came on the Face Time screen to say hi!  I made these little friends talk to her and play peek a boo with her.  Her grins were worth it all.  :)

Carson has taken a new liking to Caillou and his sister Rosie, another kids' show.  So I found Caillou and Rosie printable paper dolls online and had fun coloring and cutting them out.  Carson was pretty surprised the next time we did Face Time to see that Caillou and Rosie were at Mimi's house!  

I had planned to mail these little friends to the grands, but for now I'll keep them for our Face Time fun.  :)


Another fun way to connect long-distance is to make a short little video with your smart phone and send it by text or email to your grand's parents.  I have a Raggedy Ann and a stuffed Charlie Brown that often make appearances with me on videos to the kids.  I sing a song with Ann or Charlie and ask the kiddos to sing or clap with me.  Yes, I look a bit silly, but who cares!  The kids like it!  :)

So those are just a few ideas of ways to connect with your grandbabies long distance.  And have you read my post HERE about keeping a journal for your grands of the times you spend with them?  I'm having a ball writing down the cute things they say and do, as well as adding photos of our times together.

Do you have some fun ideas for building relationships with your long distance grand darlings?  We'd love to hear them!

Be Blessed,

Donna

Linked to 
My Romantic Home
Inspiration Monday
Sunday Best Showcase
Sew Many Ways
Tip Junkie


Tuesday, March 18, 2014

Upcycled Knit Top...From Too Short and Too Low to Sassy and Sweet!

Once upon a time, this pretty cotton knit top fit me well.  I loved the print and the colors.  Plus 3/4 sleeves work for almost 3 seasons for me here in Southern Indiana.  But then, after some washings and partial dryings, it became too short and the neck line began to stretch and be too low.  Rather than put it in the Goodwill pile, I started researching ways to upcycle it.


Then one Sunday at church, I saw such a cute top.  It was made from some kind of Chiffon type fabric and had a lacy gathered 'skirt' around the hem.  Ooohhhh.  I liked it!  And then I remembered I had some white lace in my fabric stash.  And within an hour, I had an upcycled top!


I just cut a piece that was about 8 inches wide and about 1.5 times longer than the bottom edge of the top.  I sewed a basting stitch along the top of the lace in order to create slight ruffles in the fabric.  I pinned it with, inside the existing hem of the top, trying to keep the gathers mostly even all the way around.  Then I sewed it in.  


I also took up the neckline about an inch by increasing the seam on each shoulder.  And lastly added a lace panel above the pink crocheted neckline decor.  

I left the lace unhemmed, as I like the slightly shabby chic look.  It washes up great and does not ravel.  I even made a little lace embellished pin to wear with it, as seen in the 2nd photo, but mostly will wear it without.  

So enjoying my 'new' top that now fits nicely and has a sassy little lacy skirted hemline.  This is my 2nd or 3rd attempt to upcycle or refashion clothing.  Such fun...can't wait to try something else!  Thanks for reading!

Be Blessed,

Donna

Linked to
lMy Romantic Home
Tip Junkie


07 08 09 10
Pin It button on image hover