Sunday, December 2, 2012

A Vintage Little Christmas

My love for all things vintage is sparking some creative fun as I decorate the house for Christmas.  I am using some of my vintage belongings to make a few new tablescapes.  Here is the coffee table's new look for December.  The little old muffin tin is something I found at the flea market this past weekend, and I already LOVE it.

The same scene with the flash used, so you can better see what makes up the vignette.  

Eloise Wilken's book Baby's Christmas is a true favorite.  Both of my darling grandbabies have Eloise Wilkens cheeks and profiles!

The tin is holding miniature candy molds, Peppermint Pillow candies, and Scrabble tiles that spell Jesus.

With the flash, you can see my $2 bag of ABC blocks from this summer's garage saling is being enjoyed!  On the left is my childhood Christmas stocking, and I tucked in a few photos from my childhood Christmases in the 1960s.

That's me in the snow above right in 1967 and the lower photo shows my mom, my baby brother, and me with a large teddy bear in 1965.  :)

Lastly, this fabric underneath the display is called Dick and Jane at Christmas Time!!  Bliss!

Thanks for stopping in!

Christmas Blessings,

Donna

Linked to:
My Romantic Home
Funky Junk Interiors
Sunday Showcase

Monday, November 5, 2012

Getting Ahead, Holiday-Style


I LOVE to get ahead in my responsibilities.  It makes me feel prepared and better able to enjoy each day.  So a recent blog post really caught my eye.  It's called Stock Your Freezer in Just an Hour Each Week.  You can click on that title and be taken to Crystal's inspiring article.  :)  I love the idea of freezing meals and desserts to have on hand, but the thought of spending hours in the kitchen and dealing with sinks full of dirty dishes turns me off.  I homeschool our 9th grade son, plus have a thriving Etsy business, so I don't feel I have time to make a month of meals in one day.  So Crystal's idea of just spending an hour a week preparing something for the freezer really appeals to me.  She even suggests just spending 30 minutes at a time doing such.  

My husband and I have all of our adult kids,  2 little grandbabes, and parents coming to our home for Thanksgiving Weekend.  Can. Not. Wait!  I want to be able to really enjoy them all so I am thinking ahead about what I can do to get ahead of the game, food wise and cleaning wise.  Today I had so much fun preparing one thing for the freezer, and now it waits there, ready for holiday baking.  Yippee!  I'll take you on a photo journey of my first one hour freezer cooking adventure, which I divided into two 20 minute segments.

Peanut Butter Blossoms are one of our VERY favorite Christmas cookies.  I'd like to have some to serve over Thanksgiving Weekend, since that is when my grown kids will be home.  During a break from school, between Grammar and Math, I got out the recipe and made the cookie dough.

All good Christmas Cookie making starts with Christmas music on Pandora...


And donning the apron my so-loved Grandma made for me when I married in 1984....
One recipe makes 3 1/2 dozen.  Easy to mix up the dough during my break. (Then, back to school and lunch before I came back to finish this job.)

Roll into balls and roll in sugar

And now for the surprising part...I put the cookie balls on plates to FREEZE!  I'm not a huge fan of cookies that have been frozen.  Nor of making cookie dough AND baking it all in one setting.  I'm a short-project kind of gal.

I had two plates full of cookie dough balls...into the freezer for an hour and 15 minutes of while I cleaned up lunch and finished school with my son.

Took the plates out of the freezer.  Two plates of amazing cookies ready to bake and top with a Hersheys Kiss.  Bliss!  Fresh baked cookies will only be about 15 minutes away, whenever I decide to bake them.  Nom, nom, nom.

Lickety split, I slid them off the plates and into a gallon freezer bag.  Zip it up, easing out the air as I go. And just for the fun of it, I tied a red bow around it.  Christmas Cookies just waiting to be baked.  (Can you tell, I'm excited!)

I wrote the cookie name on the bag and the oven temp too.  My recipe never had the minutes of baking written on it, so every year I have to figure it out again.  Sheesh.  :)

I am visualizing baking half of these at Thanksgiving, and saving the other half for Christmas.  Wouldn't these frozen cookie dough balls make a fabulous gift for a friend, neighbor, teacher, or your Pastor's family?  You could wrap them cute, and add a nice tag.  We sometimes are given too many cookies at Christmas, so being given frozen dough balls might be a real blessing for your friends to bake and use at whatever time they need them.

I'm planning to make 2-3 more types of cookie dough balls to freeze before the holidays.  Also several pies (baked), a frozen dessert, and our Thanksgiving Sweet Potato Casserole.  Any other ideas from you readers and friends?

Hope you are inspired!


Blessings and Happy Getting Ahead!

Donna

Linked to:
Sew Many Ways Linky Party

Thursday, October 4, 2012

Purse Organizers Make Great Gifts!

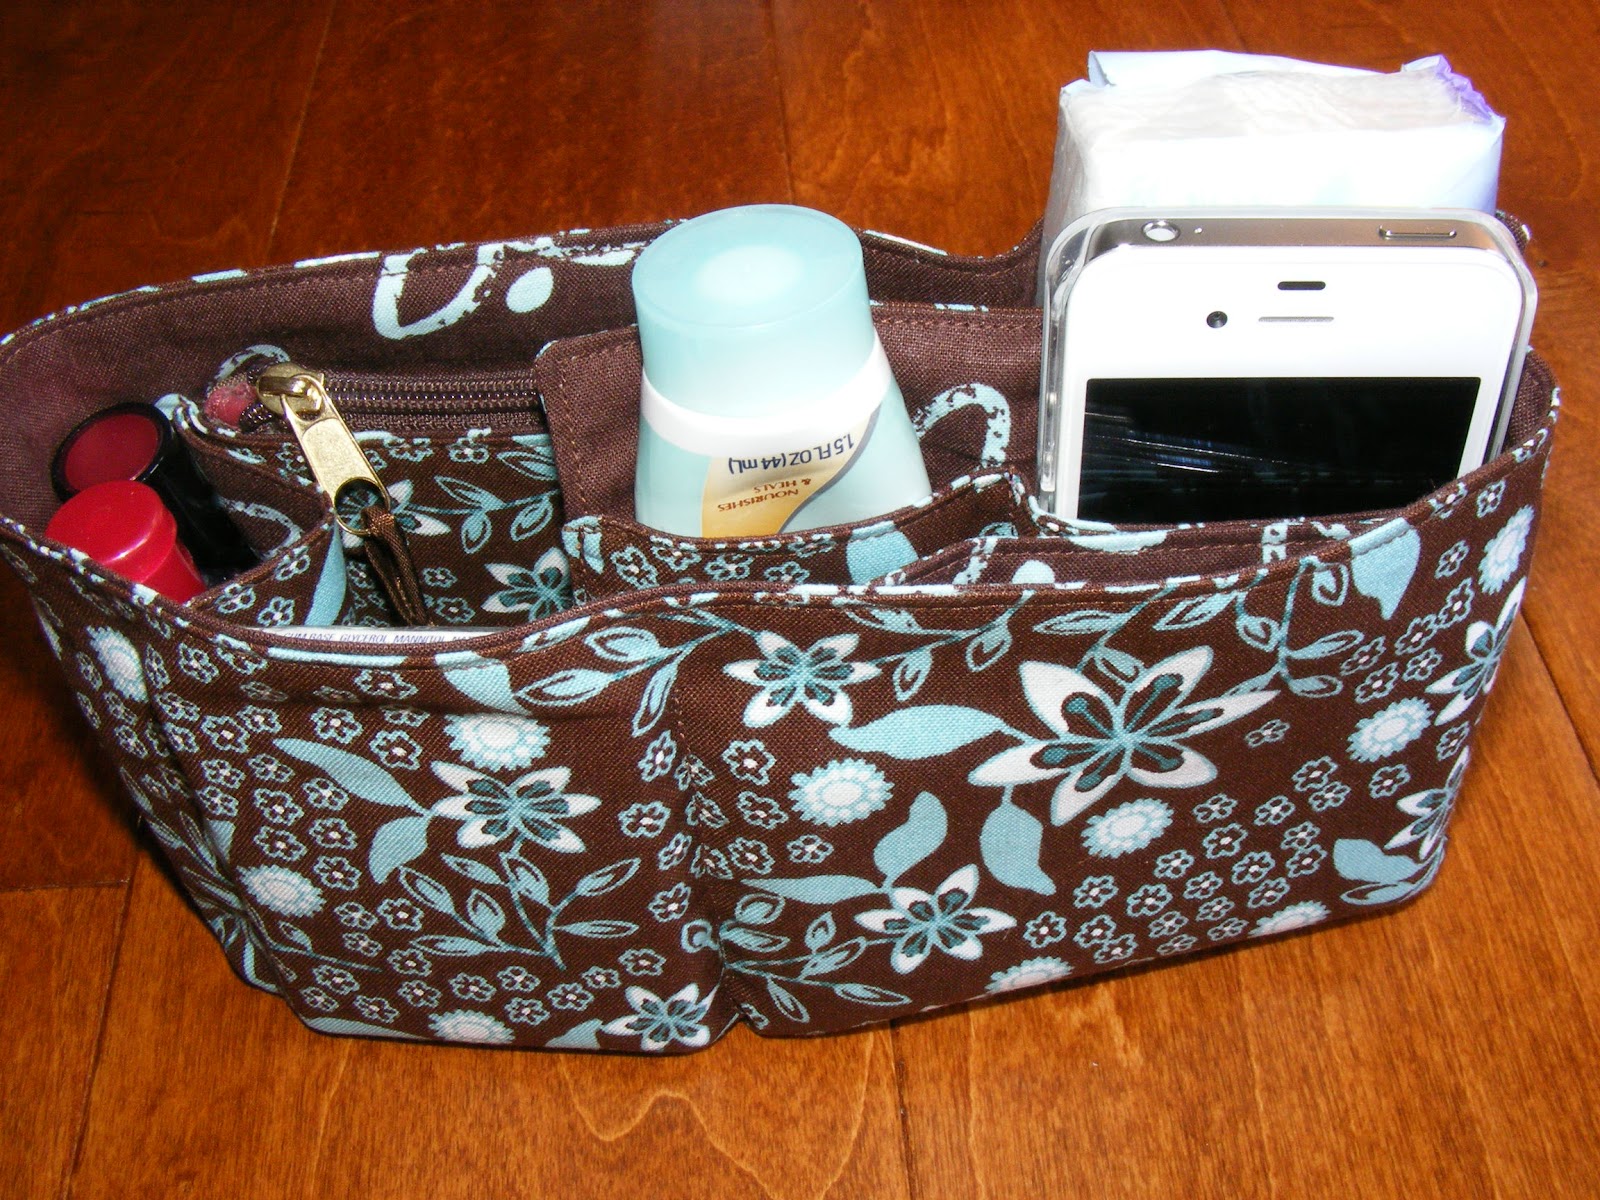
A year ago, I followed a simple tutorial from a blog and made myself a purse organizer.  I blogged about it HERE and this link will take you to the blog where I first found it featured.  :)  I've used it everyday since!  LOVE it!  Keeps my purse tidy and makes it so much easier to switch purses.

Since I like mine so well, I am making them for my Etsy shop, Perfect Darlings.  If you are the crafty type, go for making it yourself!  And if not, head over to my Etsy shop and see if you are interested in one for yourself or a gift. These would make such nice gifts for b-days, Christmas, or any other occasion.

I'm just going to let the photos show you the prettiness and the usefulness of these little beauties.


                                                                      Blessings!
                                                                       Donna

Linked To:
Sew Many Ways Linky Party

Thursday, September 6, 2012

September Means Soup


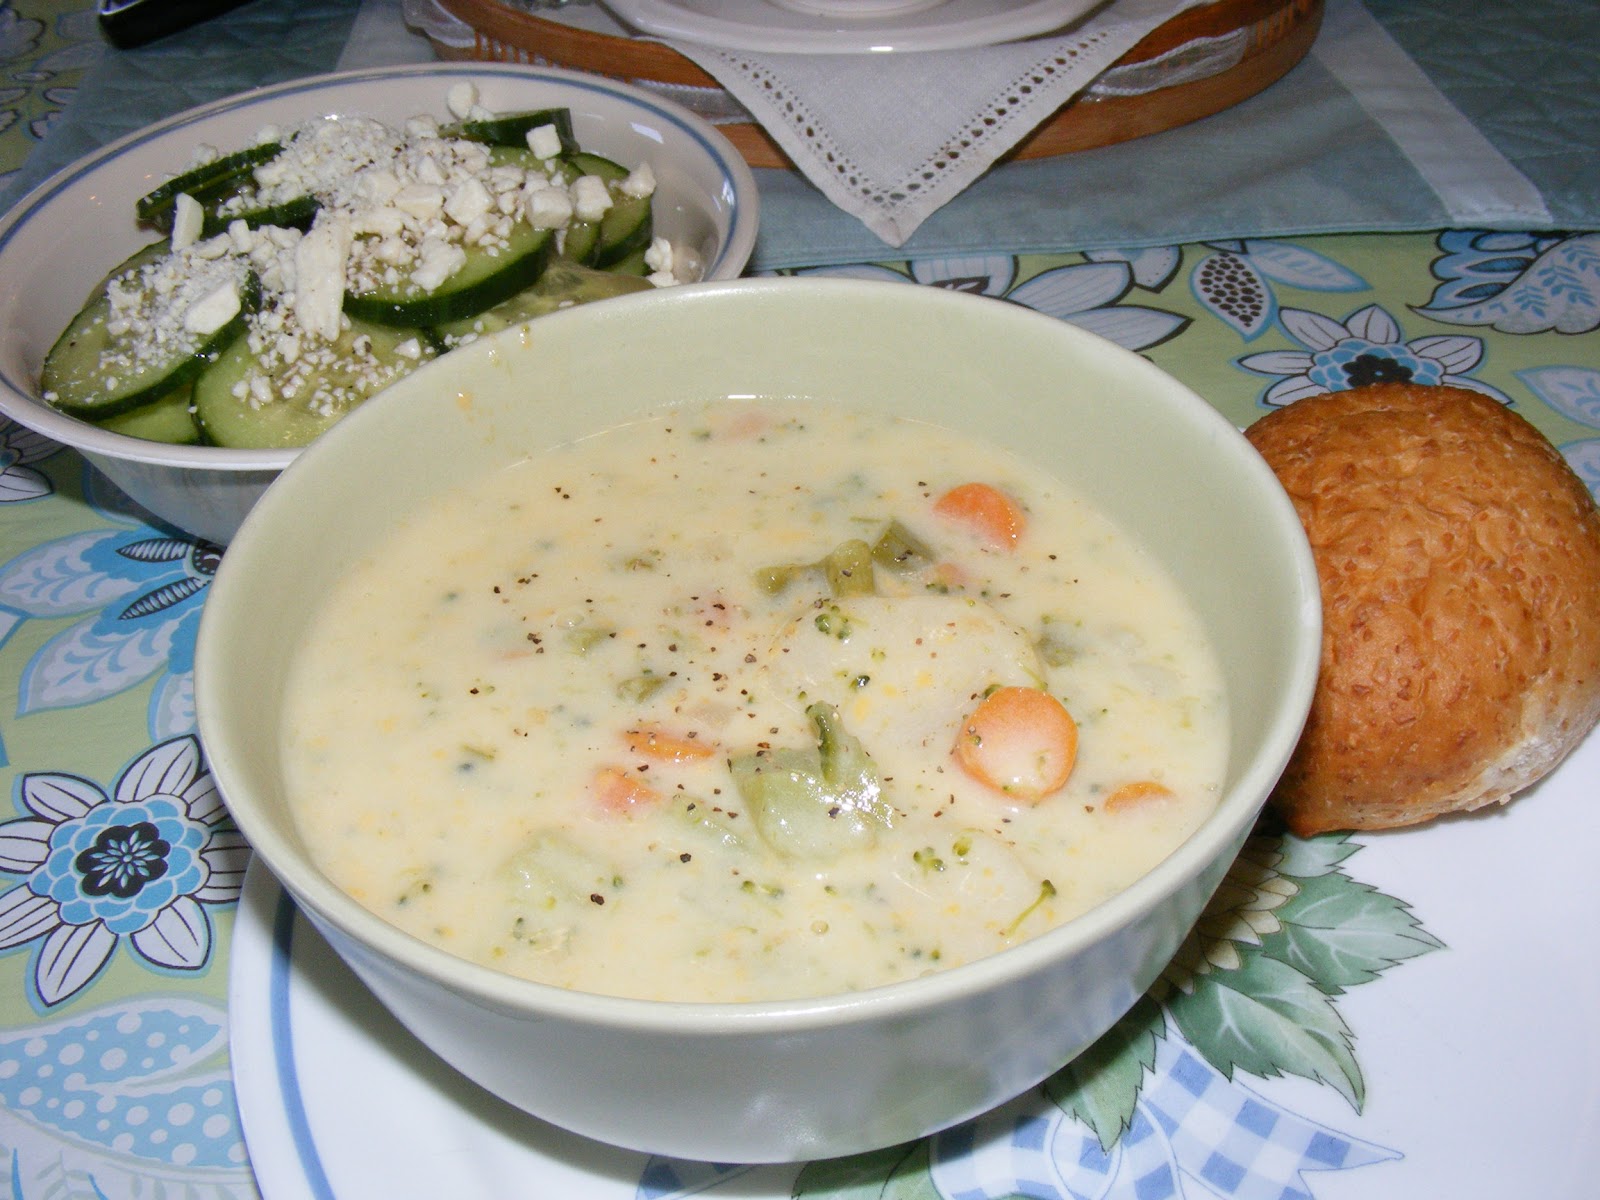
One of the wonderful things about the return of Fall is adding homemade soup back into my menus. Even though it is still in the 80s and 90s here in Southern Indiana, my tastebuds are ready for heart, healthy soups.  So last night I made one of my new favorites from this TOH cookbook.  I love Comfort Food and I love healthy food.  Win-Win!


I tried this recipe a few weeks ago and my somewhat picky 14 year old son, gobbled it down. It was a winner! 

See the '5' I gave the recipe in the margin?  I rate new recipes and books that I read with a 1-5 with 5 being a definite make again or read again.  :) This recipe is simple and fairly quick.  You can't see the last couple of sentences of the directions, so I'll give them to you here.  You mix the flour and the remaining cup of milk into a smooth consistency and add to the soup, stirring constantly.  Bring to a boil for 2-3 minutes to thicken.  Then add the cheese and let it melt.  Done!
I used frozen broccoli, fresh carrots, onions, and celery, and a can of little whole potatoes that I sliced (add canned potatoes near the end since they are pre-cooked).  I used grated cheddar cheese instead of Velveeta.  This recipe is very versatile...use what you have.  And a bonus...it is meatless, yet still hearty!  


Makes about 6 large bowls of soup.  It fed the three of us (2nds for my husband) and will be a lunch for 2 out of the leftovers.

I added a cucumber-feta cheese salad and a whole grain roll.  Dinner is done!
I got this cookbook on Amazon, slightly used.  Highly recommend.  Lots of photos and we've really enjoyed every recipe I've made from here!

Happy September!

Blessings,
Donna
Linked To:  2805, My Romantic Home, At the Picket Fence,

Saturday, August 25, 2012

DIY Kitchen Towels for Gifts and for You!

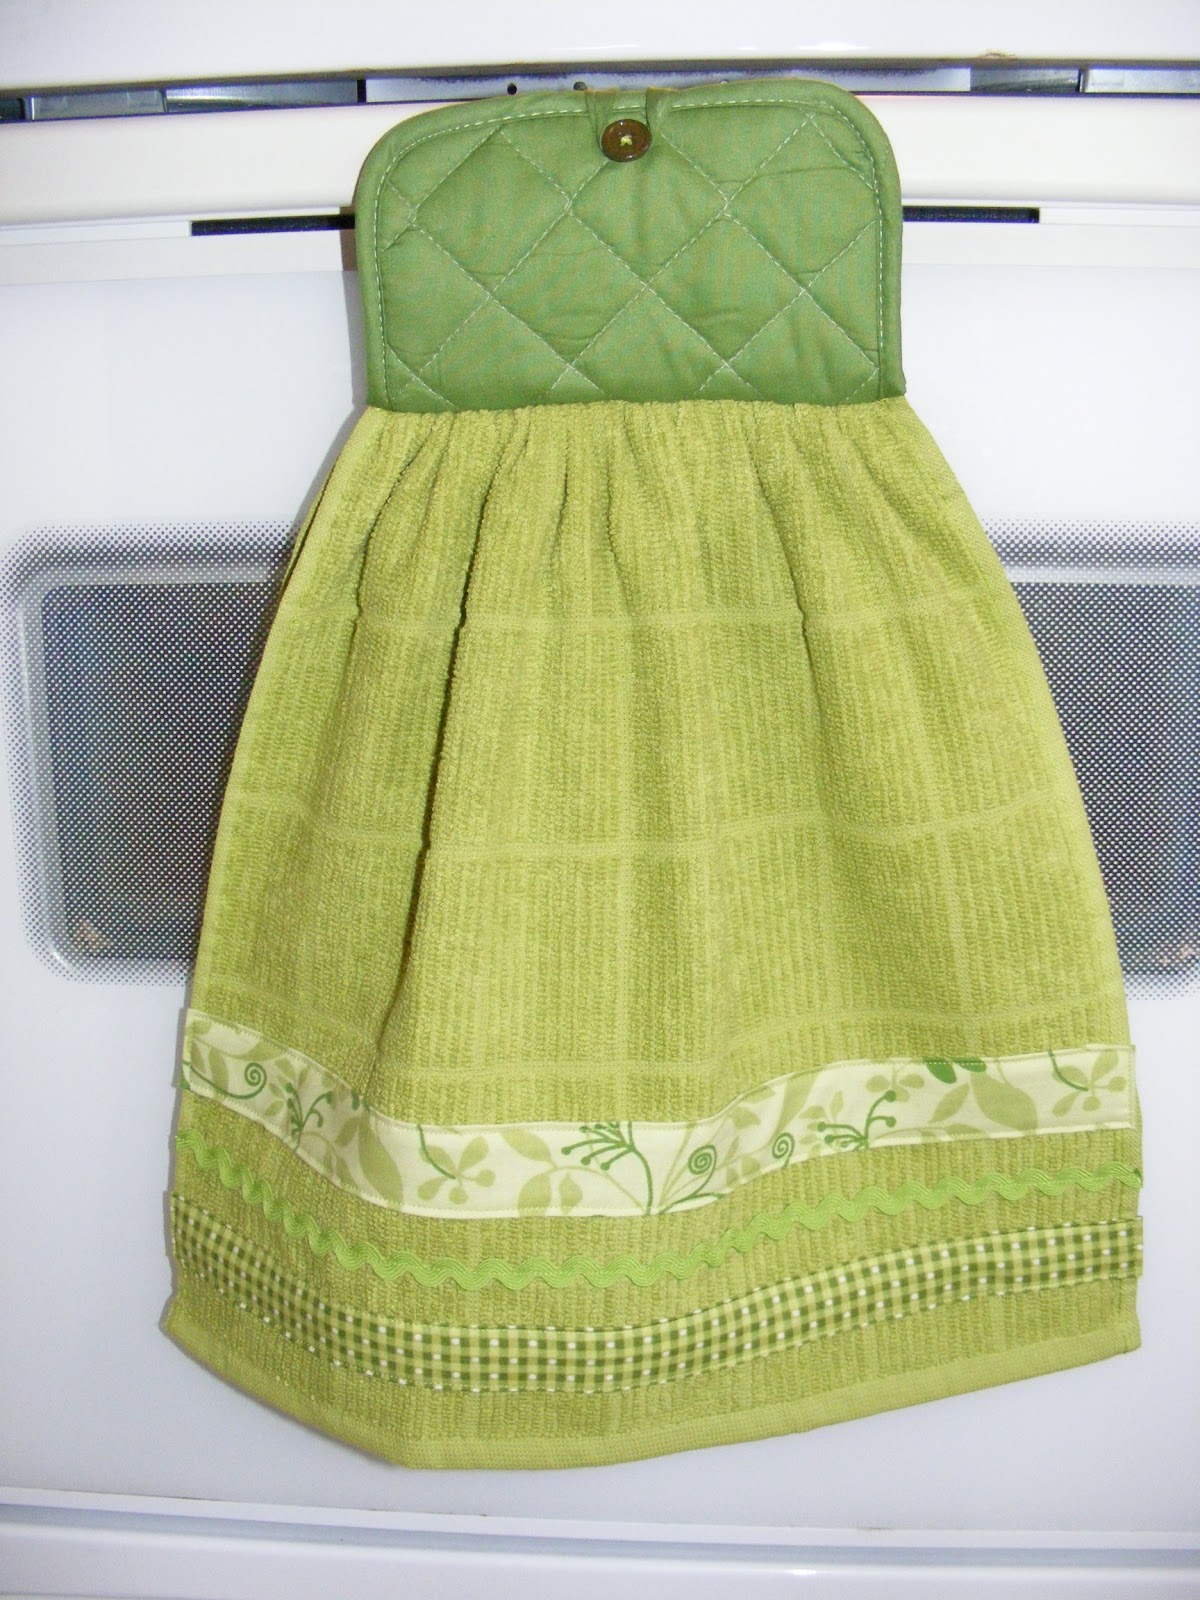
Last Christmas I figured out how to embellish a kitchen towel for my mother-in-law into one that fastened on to her oven handle.  One of  our dear family friends liked it so much, she asked if I could make 3 for her to give as gifts!  So knowing that she wanted 3 towels in a green palette, I bought 3 nice towels on sale at Target, and used some cute scraps of fabric  plus rick rack and ribbon, and in no time had these three little ladies ready for giving.
This one has the potholder attached to the top, like the one I made for my Mother-in-Law so that it can be fastened to the oven handle.  I plan to attach green potholders to the other 2 towels as well, once I find the ones I need at the store.  

I ironed in a hem on all sides of the strips of coordinating fabrics and sewed them to the towel, plus added rick rack for a sweet vintage touch.

For this towel, I machine stitched 3 rectangles of fabric together to make one long strip.  Then ironed in a hem and sewed it to the towel, finishing it with some rick rack.


This 3rd one is my favorite.  I love the four bits of fabric sewn together, and I put a little green bow on the 'different' square which is mostly yellow with flecks of green in it.  Putting it off center adds interest.
I heat sealed the ends of the ribbon and sewed it on securely.

I also heat sealed the ends of the rick rack so they will wash up nicely.  I was sorely tempted to add some buttons as embellishments, but that would hurt when you dried your hands on these, so I stuck with soft embellishments.
I'm thinking these would make nice Christmas gifts...and who knows they might end up being a new product on my Etsy shop, Perfect Darlings.

You can make your own if you have a sewing machine and can sew a straight line!  Give it a try.

Blessings!

Donna
Linked to:  My Romantic Home, 2805, At the Picket Fence,

Friday, July 20, 2012

One of a Kind Coasters

You've probably seen this idea on the internet 20 times.  So have I.  I purchased the 4x4 ceramic tiles at the home improvement store months ago, but just this week did I take the time to make them into coasters.  Now I'm SOLD on this idea!  Sooooo cute and easy!!

I used 4 kinds of paper/pictures to make them.  Here's how it went:  You'll need ceramic tiles, Mod Podge, a small foam brush, felt, and some spray-on polyurethane.  

I took this candid photo of my inlaws holding hands at a recent family wedding.  I looked up during prayer, and there this beautiful scene was right in front of me.  Risking the thought that it wasn't super appropriate to take a photo during prayer (grin) I am so glad I took it.  I printed this on my home printer on copy paper and it worked beautifully.

LOVE this one too.  A hymn from a vintage hymn book over which I printed a neat tree that I think I found at marthastewart.com.  So precious and looks great on our piano.

This one came from a vintage book of maps I found at a garage sale for 25 cents.  My husband and I dream of a European trip sometime in the next 5 years.  This is a sweet visual reminder of that.  The colors of a map come out so beautifully in this project.

And this one is a page from a vintage children's school book.  I love the turquoise and black...two colors I use pops of throughout my home.  I think this coaster will be a favorite during the winter.  Cozy.

Here are the instructions:
1.  paint a medium coat of Mod Podge over the top of the tile
2.  lay the picture you have chosen and precut to size over the Mod Podged surface and gentlly smooth it down.
3.  Mod Podge over the top of the picture.  Let dry for 15 minutes.
4.  Apply a second coat of Mod Podge over the picture.  It will dry clear and hard.
5.  When dry, take outside and set on newspaper.  Apply several thin coats of spray polyurethane.
6.  Let dry 2 hours and spray again.  I did this about 3-4 times throughout the day.  This will help protect the finish from a sweating glass.
7.  Cut a piece of felt and glue onto the back to protect your table tops from scratching.
8.  Enjoy!  Give as gifts!  Make more!


This was such a fun project.  Very useful too.  I'm planning to make some as Christmas gifts using pictures that will be meaningful to the recipients.  I think my grown kids all need one of their grandparents holding hands after 45+ years of marriage.  Perhaps a neat set of their other grandparents married 53 years and of us married for 28 years. A testimony to the blessings of working through marriage through the rough patches for the joy of growing old together and sharing a life history of so many years.

Thanks for stopping by!
Blessings,
Donna
Linked to:
My Romantic Home
07 08 09 10
Pin It button on image hover