 |
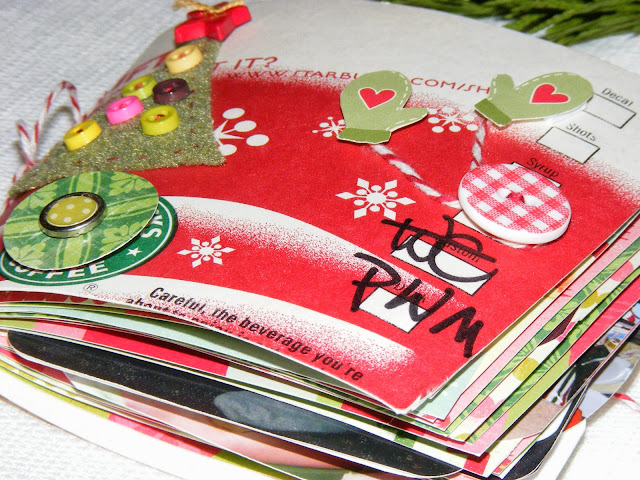
| I'm excited to share this fun craft with you today! I learned this idea from Angie at Echos of Laughter last year. She is such a creative girl! Be sure and check out her delightful blog for a full tutorial on this little scrapbook. |
 |
| You cut the bottom of the cup off and then cut the cup down the seam to make the cover of your book. |
 |
| Then you make a template for your pages. I covered the inside of the 'cover' with cute paper and then made double page spread pages for the rest. |
 |
| Since my b-day is in December, I decided to make my book about all the festivities of December rather than just Christmas. Because the pages are small I had to get creative with the photos...cropping them when I was able, or cutting them and squishing them together. |
 |
| It's cute to use as many 3D touches as you can...so I used foam dots under embellishments and little photos. |
 |
| I also put photos of a craft I made for gifts and of some decor I used for a dinner party. Note the C'mas tree embellishment with a button on top. |
 |
| Our Christmas Eve appetizer buffet...I had to cut part of the photo and superimpose it over the main part of the photo to get most of it on this page. |
 |
| Our puppy dog's stocking! And I found that one of my photos had this picture of my Gooseberry Patch calendar in it, so I cut it out to add to the book. :) |
 |
| We had a white Christmas! |
 |
| My sweet puppy-girl...Gracie. She was enjoying Christmas Day! |
 |
| Here you can see that I cut the photo in half and spread it over two pages. |
 |
| And I used a pick to poke 2 holes in the middle (folded part) of the pages and the cover. This baker's twine ties it all together. Worked out really well. I hope you enjoyed this little sweet idea! And thank you Angie for this adorable, brilliant idea! I really love it! Merry Christmas!! Donna Linked To: Whatever Goes Wednesday My Romantic Home Tip Junkie Here's to Handy Andy |


