Showing posts with label crafts. Show all posts

Sunday, March 30, 2014

A 30 Minute Spring Bunting

I do believe that Spring has come to stay here in Southern Indiana.  We'll still have some chilly days, but I think the highs will now be in the 50s, 60s, and above.  Yay!  I just enjoyed a lovely week of Spring Break...I homeschool our 16 year old son, and so it was nice to have a full week off of school to do some deep cleaning, organizing, reading, and of course, crafting.  :)  The mantel needed a new Spring bunting, but having already done lots of crafting this week, I wanted it to be quick and 'semi-homemade' so here's what I did.


I used some cute cardstock cards that are designed for Artist Trading Cards or scrapbooking, and just embellished them a bit.

In between each embelllished card is a little book-page square that I punched from a vintage book, layered with a punched flower and a stick on center.


Mini clothespins made it a quick project too, and within 30 minutes, my bunting was hung.  I like it!  And I could reuse any of these elements for a different project sometime, if I wish, since they are not glued or sewed to the string.

Thanks for popping by!

Happy Spring!
Donna

Monday, January 20, 2014

Little Sweet Hearts

Time for a few sweet Valentine crafts!  January is a great time to start them...less pressure, which means more fun, knowing that Valentine's Day is still weeks away.  I decided to play around with some red and white fabric, embroidery floss, felt, and embellishments to make some sweet hearts that will be fun to give to friends with a card and to tuck into vignettes around the house.  So here we go...

I mostly used fabric for the fronts of the hearts, and felt for the backs.  But this polka dot felt was a must for the front of one of the hearts.  Just fold some scrap paper in half and cut out a heart about the size and shape you desire, to make a pattern.  Then cut out the fronts and backs to your hearts, using that pattern.

I used a woven fabric for the white heart, which had places for me to freehand a cross-stiched heart.  You could use aida cloth for that too.  Or even burlap!  Red felt worked great for the backs of the hearts.  Felt is so easy with which to work.  Use 2 strands of red, black, or white embroidery floss for stitching the heart fronts and backs together with a running stitch...leaving a little opening with your needle and thread still intact.
Using a small funnel stuck into the little opening, I filled each heart with some fragrant loose leaf tea.  Orange Cinnamon tea makes a great choice!  If you don't have loose tea, you can use fiberfill or dried lavender or even dry rice with a few dried herbs mixed in.  Yum!

Then finish stitching your heart together, knotting it on the back.  Give her a sniff...ahhh.  Not only cute as can be, but fragrant as well.

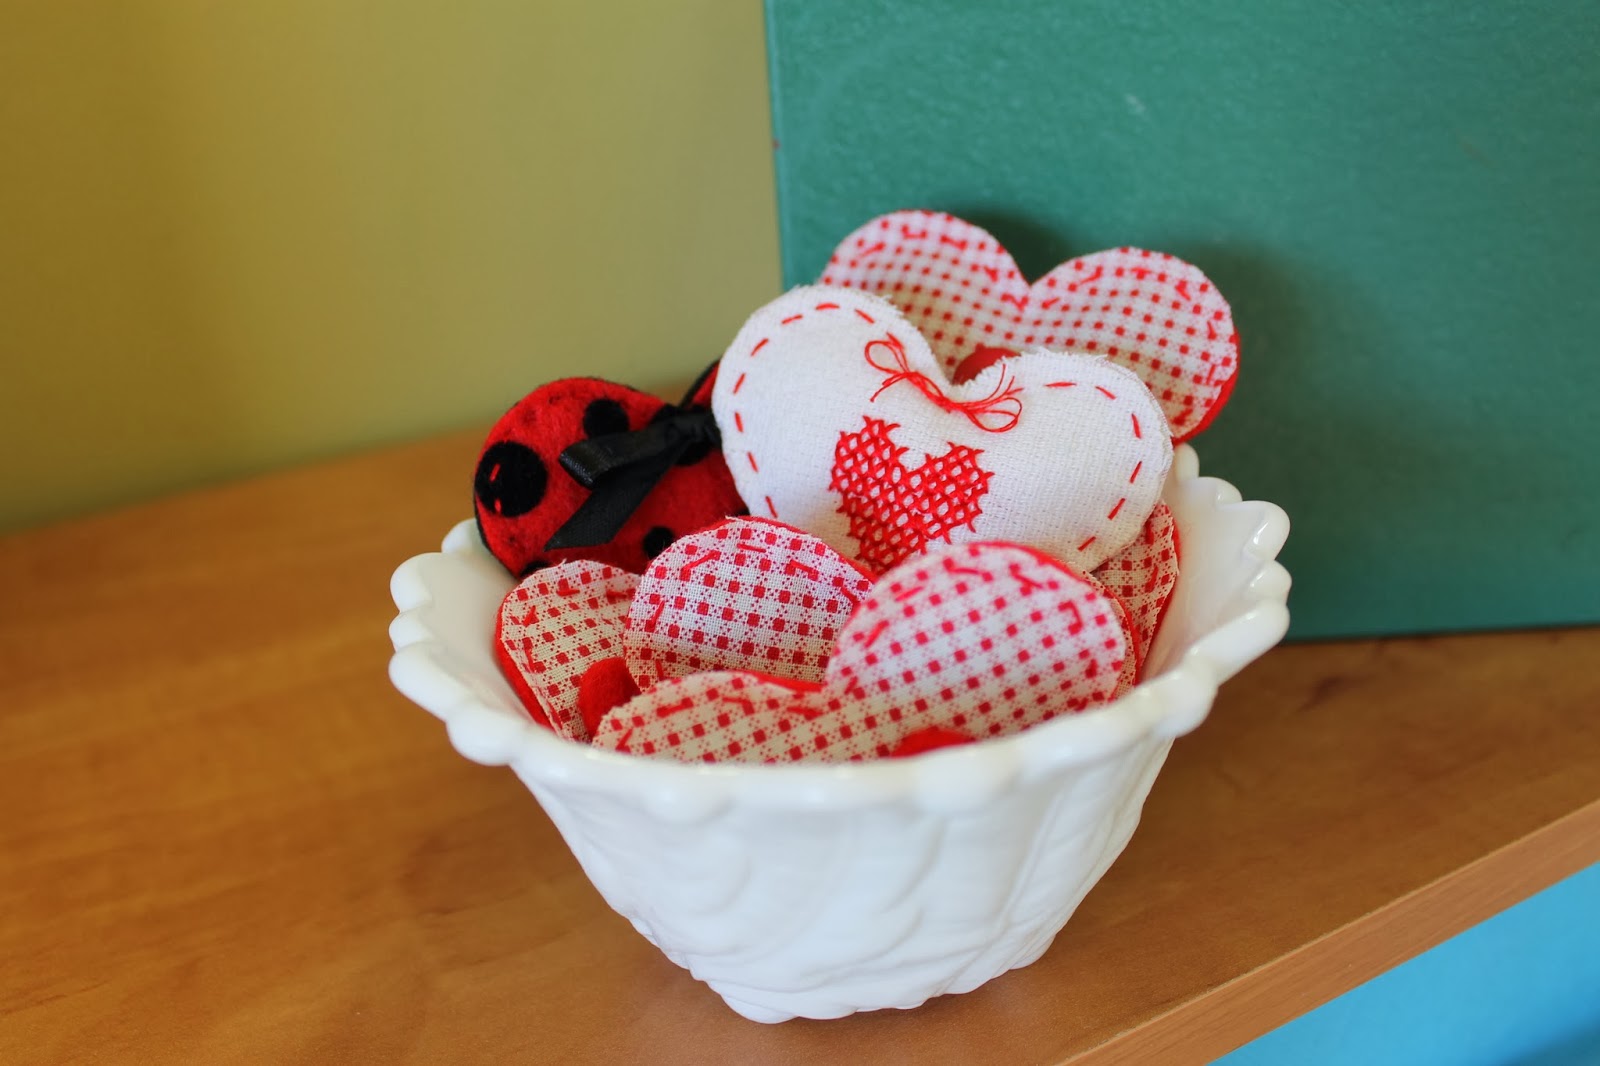
I embellished the front of each heart using buttons, felt hearts, stick on jewels, and ribbon.

Aren't they sweet tucked into a little white vintage berry bowl?

I am going to enjoy them in my sunny craft room for a week or two...then...
I

...give most of them as gifts.  I have one of them tucked into a shadow box too.  Cute little Valentine surprise peeking out from that unexpected place.

These are all hand cut, sewn, embellishments glued...so you can easily sit and do this in the evenings.  We are getting back in the swing of having one hour after supper most nights where we are 'unplugged' from electronics.  That one hour gave me a head start on creating these.  If you made these alittle bigger ( mine are 2 inches tall) and filled them with dry rice, they would make cute hand warmers!  Use your imagination and above all ENJOY!

Blessings,

Donna


Linked to:
Tip Junkie


Monday, January 14, 2013

Felt Farm Animal Puppets

Our sweet little firstborn grandchild just turned one.  Happy 1st Birthday Carson Davis!!


His Momma dreamed up a darling birthday party for him.  The theme was Old MacDonald's Farm.  So farm animals played a large part in the decor.

Being that I love crafting, my daughter asked if I'd come up with some kind of table centerpieces for the tables where the guests would enjoy eating a farm fresh lunch!  "Of course!" I replied.

I found some cute farm animal ideas online and settled on these darling felt puppets.  I found these at Just Another Day in Paradise and was so glad that Larissa provided the patterns for free as well.  Cute for the party, and reusable throughout the years as fun toys!

I tweaked them a bit for my time schedule, just doing machine stitching around the outsides of the puppets, leaving raw edges, and sewing wrong sides together.  I used fabric glue to attach the faces and other details.  I did sew Kitty's whiskers on, using embroidery thread.

And here is how we displayed them on the tables...we sat each one over a small plastic cup turned upside down so that it would stand up, and then tucked some raffia around the base, as if it was in the barn.

Puppy got to welcome the gifts on the gift table.  :)  Carson will be able to play with these puppets when he is a bit older.  Since he loves animals so much, I'm sure they will star in many puppet shows over the years!  One little hint would be to make the body of the puppet a bit wider (another inch?) if you want adult hands to be able to wear the puppet.


Carson had such a fun birthday party!  Especially since our 2nd born grandchild, Eloise Mae, got to come too!  Eloise and Carson are just 7 weeks apart, and are sure to have GREAT fun over the years as cousins.  :)

And that's me.  Mimi!  I'm the happiest Mimi there ever was, when my arms are full of my granddarlings and my heart is full from having time with them.  There is nothing better!

Thank you for stopping in!  You'll find the puppet patterns HERE!

Blessings,
Donna
Linked To:
Tip Junkie
Your Home Based Mom

Wednesday, November 9, 2011

Porch Chalkboard

Recently I read about the benefits of having a little chalkboard on your front porch...you can greet guests with a little message, and people who stop by when you aren't home can leave a message for you.  Brilliant!  Then I so enjoyed the cute chalkboard at Ellen's home HERE, and that clinched it for me.  Time to use that can of spray chalkboard paint that I bought 9 months ago!


The steps were very simple.  And since this is going outside, I didn't spend money on a nicer frame, nor go for perfection.  I 'shopped' the house for an old 10x13 cheap wooden frame that I hadn't used in years.  Took out the glass, cleaned the glass, then put both the frame and glass on newspaper out in the grass.  I sanded the wooden frame just a bit so the paint would stick, then wiped it clean.

My supplies

It took about 3 light coats of spray paint for both the frame and glass.  So cool how the paint worked GREAT on the glass!  I let them 'cure' overnight, and put them together this morning.  Then made a quick no-sew bow out of green polkadot fabric and stuck it onto the frame with sticky tack.

Used my best First Grade Teacher handwriting to print Autumn Greetings with a big stick of chalk and she was done!  (Hi Gracie Pup!)

Fun, easy, free...my kind of project!! Give it a try...I'm sure I'll enjoy adding different embellishments to the frame for each season.  Christmas will be fun for that!
Thank you so much for stopping by!


Blessings!
Donna


Linky Parties: 
Today's Creative Blog  
Somewhat Simple  
My Romantic Home 
Funky Junk Interiors  
Tater Tots and Jello


07 08 09 10
Pin It button on image hover