Friday, March 6, 2015

Snow and Seeds...Come Hither, Spring


Living in Southern Indiana these past 5 years, we've gotten used to Spring starting early.  By the end of February, our 'cold' winter is usually done and things warm up to the 50s and beyond.  This year, however, we've had 2 sizable snows...the last weeks of February and again on March 4th.  We've had 8 snow days (public school) in the past 3 weeks, which is highly unusual!  So my desire for Spring is getting really strong.  I want to be OUTSIDE!  And I want to start seeing things grow.
For several weeks I've had my eye on a little early gardening project that Kevin of Garden Design shared on his blog.  You'll  find his excellent step by step instructions HERE.  So I saved some empty, clean milk jugs and bought some nice potting mix and a seed starter mix.  As the sun shines bright on this 33 degree Friday, I took the time to make this project come to life.


I prepared my 3 milk jugs per his instructions, leaving a hinge connecting the milk jug top to the bottom, with drainage holes and added about 3 inches of potting mix in the bottom, and an inch of seed starter mix on top.  I don't know if I needed the seed starter mix, so just go with a light, fluffy potting mix if that's all you have.  His tip for heating a Philips head screwdriver for poking holes in the jugs for drainage, worked like a charm.  I just used a lit candle for my heat source.  (Here's hoping hubby doesn't mind his Craftsman screwdriver getting the heat treatment!)  Then I put water over the dirt til it was well moistened and drained.


Next I got out my seeds.  This is a handy little idea for storing your seed packets...just use a small photo album and put a seed packet in each page window.  Works like a charm!

I chose these three seeds to plant, and followed Kevin's instructions.

Lastly, you close your little greenhouse using the hinge you left when you cut the jug.  And add 1-2 strips of duct tape to keep it closed.  Then, no matter how cold it is outside, you take your jugs outside and set them in a place where they will be able to get rain, snow, and sun.  (There's my dog, Gracie, who seems to get in many of my photos when I'm not looking!)  If there is a deluge of rain, you might want to put the caps back on the jugs temporarily.  As the weather warms, you loosen the duct tape and open the jugs for a few hours each day to let the seedlings benefit from the sunshine and cool breezes.  When your plants have sprouted, grown a bit, and it is safe weather-wise to move them into your garden, you cut a flap in the side of the base of the jug, and slide the dirt/plants square out.  Using a knife, cut them like brownies into sections to plant right into the garden.  They will already be 'hardened off' and ready for life in the great outdoors.

I'm hoping that before I even put these into the garden, I can pick a few leaves to put on my sandwich.  That's the best part of gardening...walking out and picking something fresh for a meal, right when you need it.  :)

Ready for Spring?  Got snow and cold?  No problem!  Try this little seed sowing method and let the gardening season begin!

Blessings,

Donna

Monday, January 19, 2015

Energy Bars (Or in My Case, Coffee Treats)

I recently discovered an old recipe from a homemaking magazine, that has quickly become a favorite.  Got 15 minutes?  You've got time to make these from start to finish. 
It all started when I pulled out some old magazines to peruse for new recipe ideas.  This little sweet magazine used to feed the inner Caroline Ingalls in me, back when my kiddos were young.  Happy sigh.  Those were the BEST days. 


This recipe for Energy Bars from a lady in Canada, caught my eye.  Pretty healthy and quick.  So I gave it a try that very day.  We LOVED it!  Super tasty, quick, and satisfying.  Just 2 one-inch squares with coffee made me feel like I'd had a real treat.  Today I made it again (just one week later.)  So here's how it goes.


Since I like short cuts and saving energy (time and money), I didn't toast my oats in the oven, but rather 1) in a large skillet on medium-high heat for several minutes, stirring often, or 2) in the microwave for several 30-60 second cycles, stirring after each cycle.

Next you melt the butter, honey, peanut butter, and marshmallows in the same skillet (put the toasted oats on a plate til you add them later) or in a saucepan.  Stir often...it goes quickly.  For those who have peanut allergies in the family, I'm sure you could just add more marshmallows and butter and skip the peanuts and peanut butter.

Instead of a cup of peanuts, I used these 2 bags.

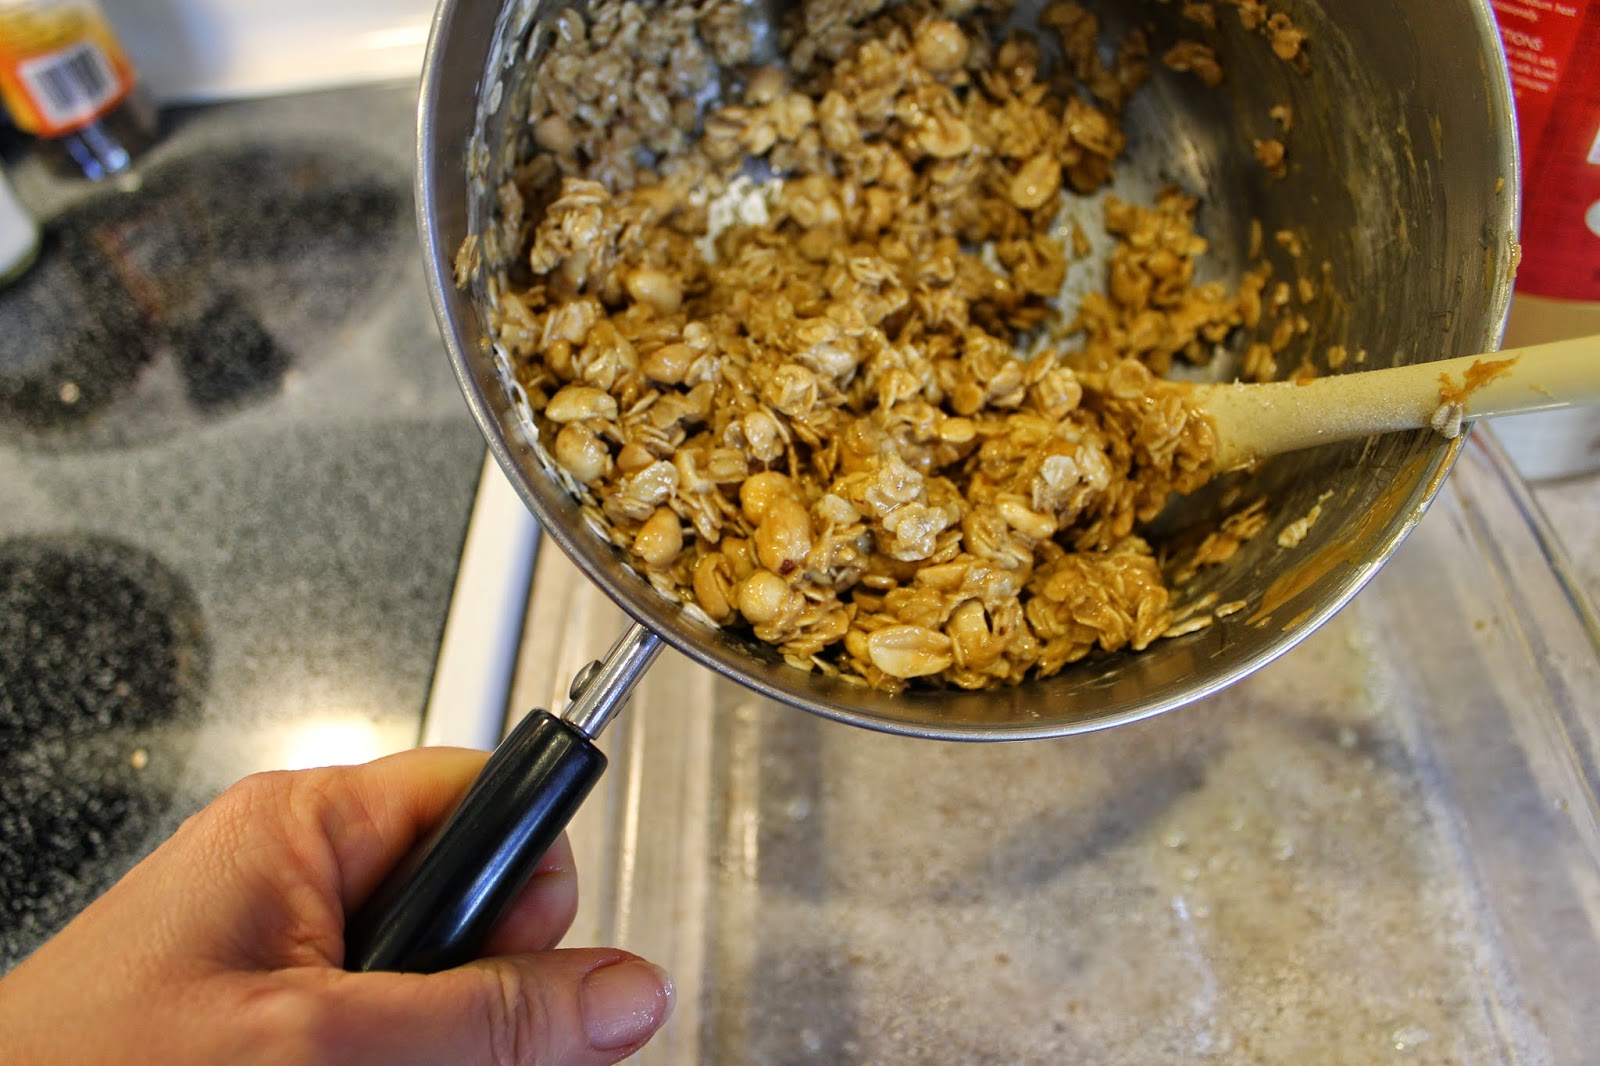
Add the peanuts and stir, then add the oats and stir.

Looks like this.

Grease an 8x8 pan, and press the mixure in with a silicone spatula.  The sticky mixture doesn't stick to the silicone, so it works great.  If you don't have a silicone spatula, put a plastic sandwich bag on your hand, and press it in with that hand.

And my own little addition...add a few chocolate chips on top and press them in.  Chocolate makes any sweet treat better.

And after they've had time to cool and set up a bit, cut and eat.  I told my husband to cut them small, so we can eat some 2X a day without gaining weight.  :)  That worked last week, so I'm sticking to it!

They are sooooo good.  The peanut butter, oats, and peanuts satisfy you with just a small serving.  These can be gluten free if you use oats that are not cross contanimated with wheat.  And other mixins would be good as well...such as sunflower seeds and coconut.

Enjoy!

So Blessed,

Donna


Wednesday, October 1, 2014

DIY Mini Pumpkin Decor

I think God created miniature pumpkins to make us smile, and feel warm and fuzzy inside. :)
These sweet little embellished pumpkins are certainly doing that for me around my house.


Better Homes and Garden's October issue planted the idea in my mind.  I didn't want to go out and buy the greenery and little berries that they used, although I loved them...so I used supplies I had at home.   And I wanted to make personalized tags that said Autumn phrases that I like, so although you can find their printable tags online, I made my own.

So let's get started...buy miniature pumpkins at the grocery store.  Round up some raffia, greenery, mini flowers, craft paper, a Fall punch, twine, little hole puncher, craft glue, and a hot glue gun.  Now you are ready to roll.

I was out of brown wrapping paper (like used for wrapping a box for mailing), so I got out a brown grocery bag, cut out an 8.5x11 piece, and fed it through my printer.  Created a word doc of sweet Fall phrases including Harvest Moon, Thankful, Happy Harvest, Autumn Bliss, Blessed, and more, then printed them on the brown paper bag.  Use a variety of fun fonts, for added interest.  I have a leaf punch, so I added some orange print leaves to the tags, and punched a hole in the upper left corner of the tag.
Tie a raffia bow around the little pumpkin stems, then thread some natural twine through the tag hole, and tie the tag to the stem as well.  For this little pumpkin, I added green paper leaves to the back of the tag.
For this set of pumpkins, I hot glued a couple of vine leaves to the top for greenery.  And for some of them, I hot glued some little yellow fall flowers from the craft store.  You'll see one rogue tag in this photo...I printed out one tag I found online, but after that, I made my own.  Do whatever suits you!  :)


When you are finished, you have the FUN of setting a few around your home.  And gifting a few.  And maybe even selling a few.  :)

My $8 vintage sewing drawer with it's glass handle, is happy to be decked out for Autumn.

The fireplace mantel is dressed for Autumn, as well.  Lots of layers of like-colors, textures, and patinas make a nice mantle scape...be sure to have height in some areas...and off center height is even more interesting.


Thanks for popping by to visit!  Your comments and pins mean alot!

Fall Blessings,

Donna

Linked To:
Thrifty Thursday
My Romantic Home


Saturday, July 12, 2014

Dried Beans + Low Plastic Bin = HOURS of Fun for Kids


Long ago when I was a young mom, I learned of the idea of filling a plastic bin with dried beans as a sort of indoor sandbox for my children.  They had many fun hours playing with the beans with spoons, dishes, trucks, and little figures.

Now, my daughter is a mother too, and she's continuing the tradition. Her precious little 2 year old son has his own bin of dried beans!  It is easily his FAVORITE thing with which to play!

Carson loves using his toy cars, trucks, and digging machines with the beans.  His toy animals are often in there as well.

There is no muss and no fuss as he uses his toy bulldozer to move a load of beans into his toy dump truck.

The old Fisher Price Pirate raft with the shark head was fed many, many beans while I was there visiting last week.  :)

Carson never has been one to put things in his mouth that might be a choking hazard, so he started playing with beans before age 2.  Please use wise discretion with your own little one and little grands...make sure they are not prone to putting small items in their mouths.

Isn't this cute?!  And see the little frog?

I had fun hiding his little animals in the beans and letting him look for them.  :)  A real live I Spy!  Using play dishes or mom's smallest saucepan, spoons, and measuring cups would also provide alot of kinesthetic learning and fun.

My daughter uses this size of underbed box for the dried beans.  When the lid is on, they can be stored under the bed.  She put 2 large bags of dried pinto beans in the bin, and it is just the right amount.  A vinyl tablecloth or a blanket under the bin will help to coral any stray beans that make it out of the bin.

I'm a big believer in the notion that the simplest toys and joys are what kids enjoy the most!  
So Mamas and Grandmas....give it a try!

Blessings,

Donna

Tuesday, June 24, 2014

Refrigerator Dilly Beans

Pickled vegetables...I'm a big fan. I was raised on homemade pickles, pickled beets, and pickled okra.  So when I saw this easy, quick recipe in the June 2014 issue of Country Living magazine, I began waiting with anticipation for my Dad's garden to produce fresh green beans.  I got my first 'mess' of perfect, fresh picked green beans on Monday, and today these Dilly Beans became a reality!


So here is the easy, quick recipe straight out of the magazine.  I did not have dill seeds, so I substituted dry dill weed...about 1/4 t. each jar.  After tasting them, I don't think that was needed.  The fresh dill picked from my herb garden would have been the perfect amount of dill flavoring.

I used minced garlic as that is what I had on hand.  Worked out great.  And I used a tiny bit less cayenne pepper than it calls for.  The rest of the ingredients were as stated in the recipe.


It was exciting to boil my jars for 1-2 minutes in anticipation of their soon-to-be mission.  Then I added the garlic, mustard seed, cayenne pepper, fresh dill, and the beautiful and slender fresh green beans to the jar.  

I boiled the pickling mixture, then poured it into each jar.  It made the perfect amount.


Add the lids and rings, and let the feeling of a great accomplishment wash over you like a gentle rain.  My daughter called me Amish.  And that's a compliment!  :)

Want some fresh pickled green beans?  This took about 20 minutes, and after 2 days in the fridge, they will be ready to serve.  Bon Appetit!

Be Blessed

Donna


Tuesday, May 27, 2014

Saving Money on Canned Fruits and Veggies at Sam's Club

For the past few months, I've been saving time and money by buying some canned fruits and vegetables at Sam's Club.  They come in 101-107 oz cans...so I had never given them a second glance except to think that this would be the way to go if I was feeding a small army.  Then I read the idea of buying the large can for my small family, and repackaging it for meal sized portions.  It REALLY does save time and money while giving us a nice name brand product to enjoy.  Here's what we do:  I like to buy the Del Monte Tropical Fruit Salad, Libby's Sliced Peaches, Red Gold Diced Tomatoes, and Del Monte Cut Green Beans.  I'll open one of the fruit cans per week, and dish them up into clean deli meat containers that I've saved.  This can of Tropical Fruit Salad made 5 containers of fruit for the refrigerator.

The Passion Fruit juice in this salad gives it such a great flavor.  And if there is cold, ready-to-eat fruit in the fridge that I don't have to wash or peel, I am much more apt to reach for it as a snack than the crackers and chips that are calling my name.  :)  With just three of us in the home these days, one of these containers will do us for a fruit salad with dinner.  The price for this one can is $5.58.  I don't know if you have priced canned fruit at the regular grocery store recently, but I can't get 5 dinners of fruit salad for $5.58 anyplace else, except maybe Aldi.  And the Aldi can's serving is much smaller than the servings I can put on the table from this container.  
24 servings per 107 ounce can.  Fruit salad for a gang!

$5.58 for 5 nice sized containers of delicious tropical fruit.

The Del Monte Blue Lake Cut Green Beans dished up 6 containers.  I have found that we just prefer a good canned green bean over frozen ones.  These have excellent flavor and texture, and are so, so easy.  I will put 2 of these in the fridge to use for meals this week, and freeze the other four.  They thaw and heat up just fine.  Yum!  And are an easy, last minute addition to a meal or to add to soup.

The 6.3 pound can of green beans costs $3.48.  That's 6 meals of green beans for my  family of three.


Again, this can provides 24 servings.  Not bad, eh?

I freeze the diced tomatoes in these same containers to use for soups, casseroles, and making homemade salsa.  The peaches are terrific too, and also dish up into 5-6 containers for just
$4.98.  It only takes about 5 minutes to open the can, dish them up with a slotted spoon, then add a ladle of the juice to each container.  Snap on the lids, and BAM!  Done.  :)  I recycle the cans or save them for a project.  I used one of these big cans to hold gardening supplies in my outdoor bench.  :)

So keep this trick in mind the next time you are at Sam's Club or Costco.  Maybe you'd like to buy their large containers of spaghetti sauce, corn, or tomato sauce to divide up and freeze.  Aside from Aldi and places like it, this might be the best buy you'll find.  :)

Blessings,
Donna


07 08 09 10
Pin It button on image hover